Step 2C: Make the connections at the headlight bucket
Created:
Updated:
Make the connections at the headlight bucket
Civilian dash
- The yellow/black wire with the 4 mm male bullet terminal may be configured in one of two ways: as a
lights on
indicator OR as ahigh beam
indicator.- To configure as a
lights on
indicator: The yellow/black wire with the 4 mm male bullet terminal is plugged into the far left side of the distribution panel: into the second left/front receptacle (count from the left as when facing the headlight bucket).Note: On early V700 models, the distribution panel does not have an extra position to wire as a
lights on
indicator. You will need to configure as ahigh beam
indicator instead. - To configure as a
high beam
indicator: The yellow/black wire with the 4 mm male bullet terminal is plugged into the far right side of the distribution panel: into the left most receptacle (count from the left as when facing the headlight bucket).
- To configure as a
- The white wire with the 4 mm male bullet terminal is plugged into the far left side of the distribution panel: into the third left/front receptacle (count from the left as when facing the headlight bucket).
- The white/black wire with the 4 mm male bullet terminal is plugged into the bottom of the fuse block: into receptacles five (count from the left, as when facing the headlight bucket).
- The brown wire with the 4 mm male bullet terminal is plugged into the top of the fuse block: into receptacle eight (count from the left, as when facing the headlight bucket).
- The red wire with the 4 mm male bullet terminal is plugged into the top of the fuse block: into receptacle three (count from the left, as when facing the headlight bucket).
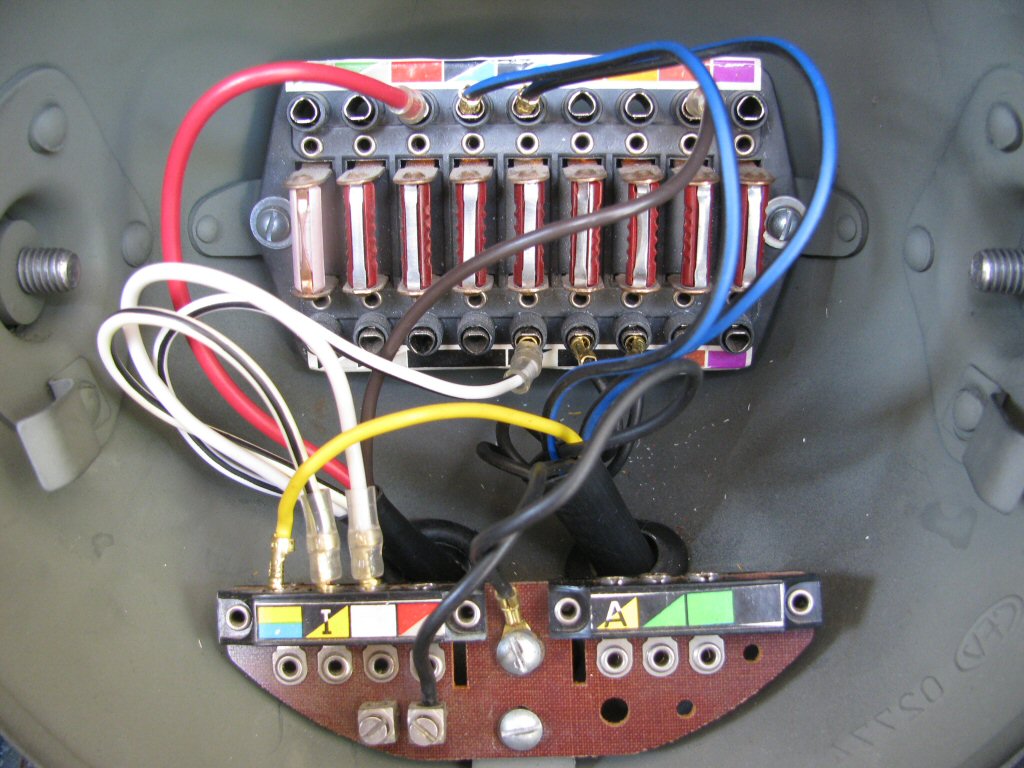
Photo courtesy of Gregory Bender.
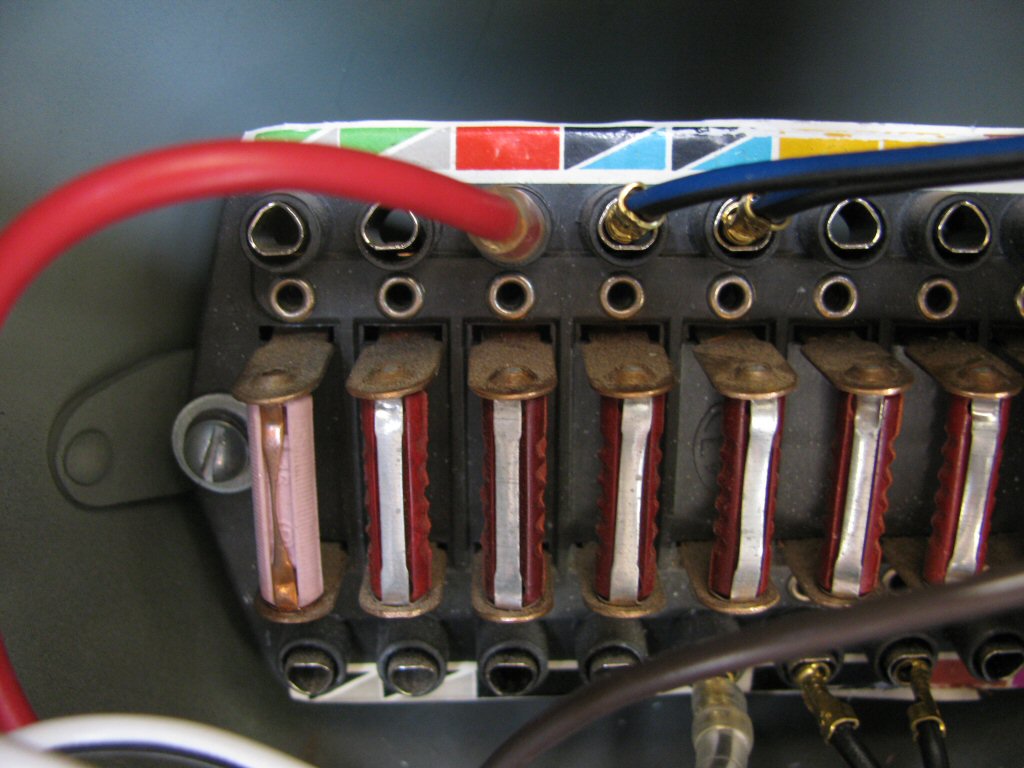
Photo courtesy of Gregory Bender.
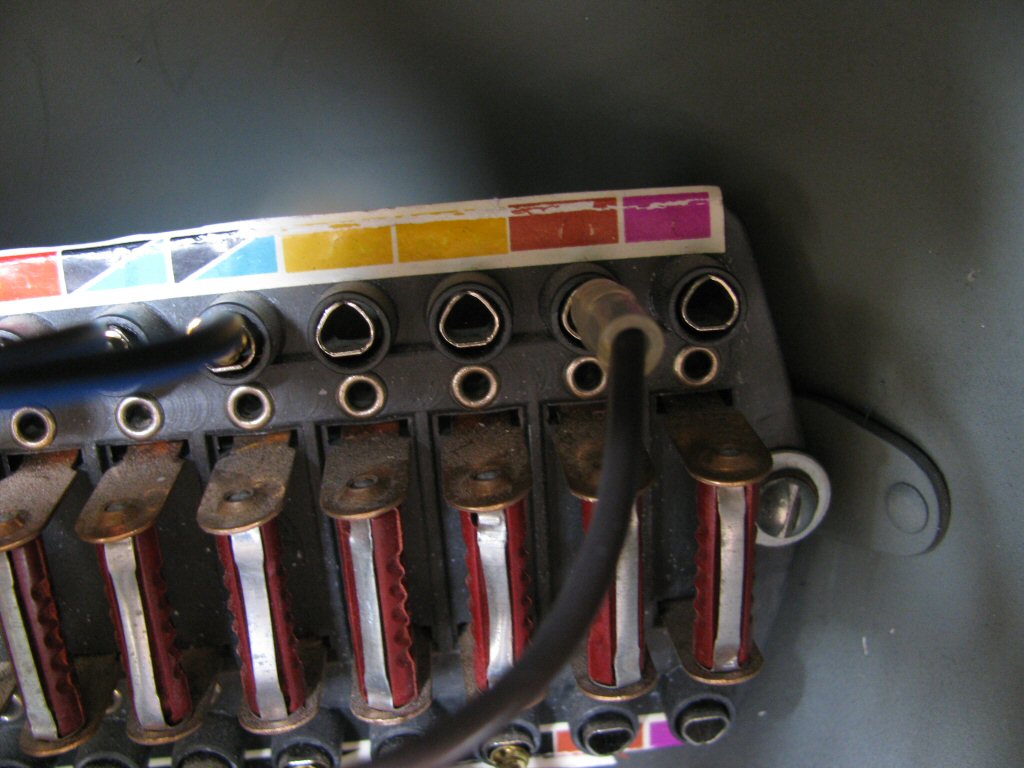
Photo courtesy of Gregory Bender.
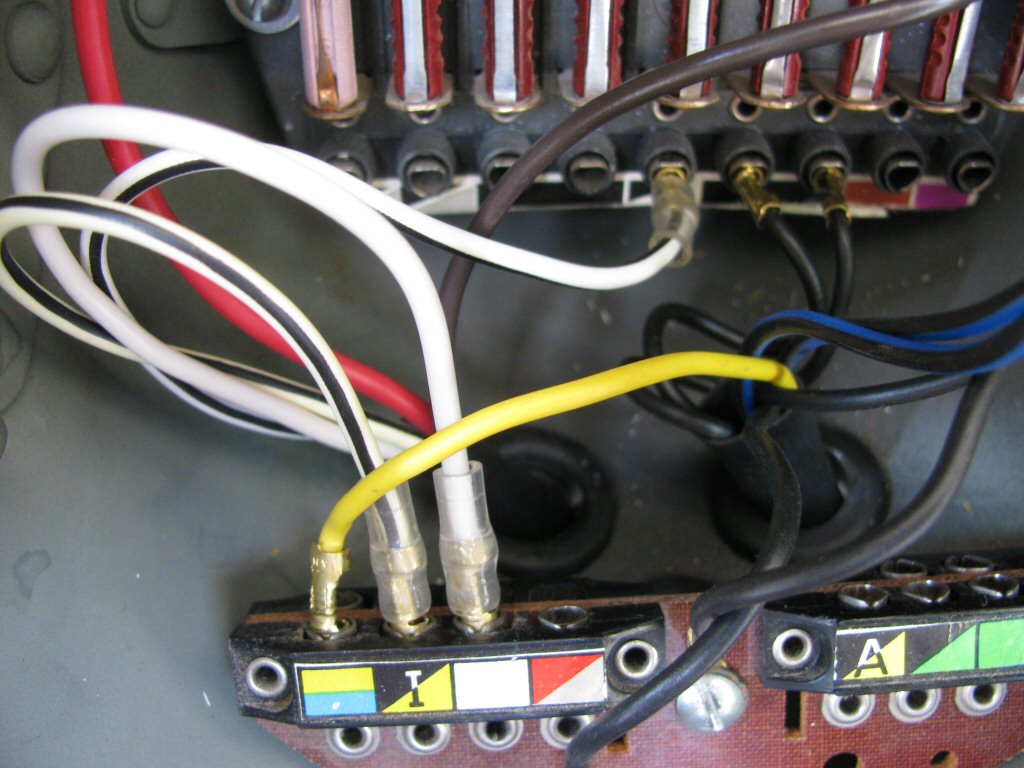
Photo courtesy of Gregory Bender.
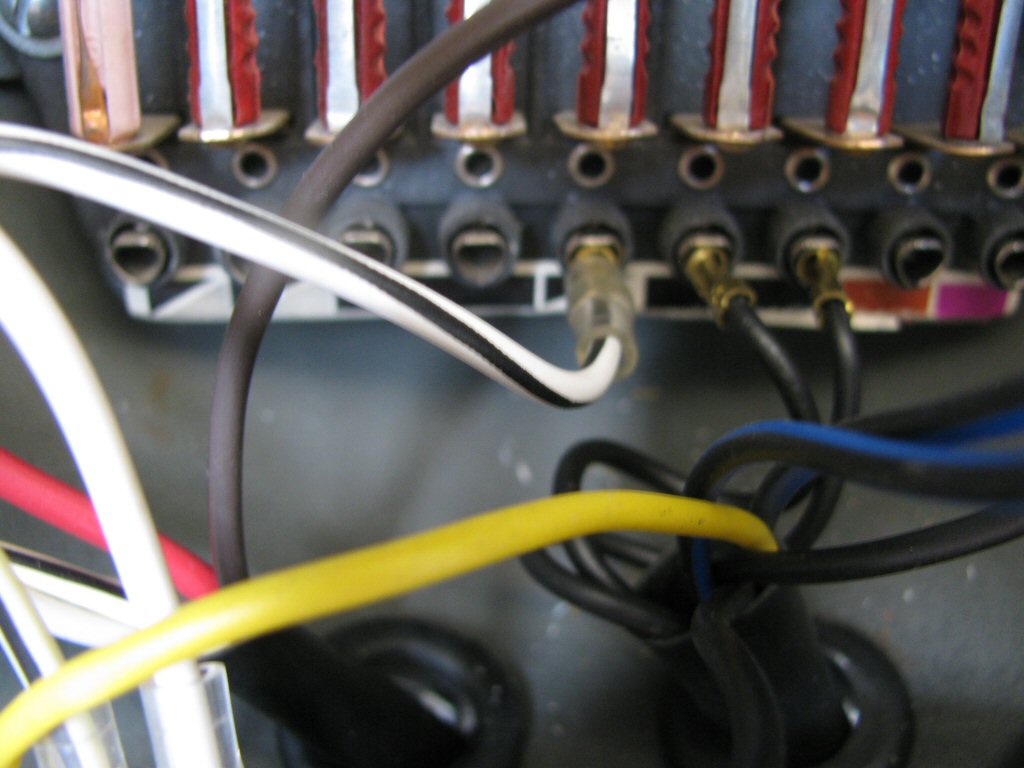
Photo courtesy of Gregory Bender.
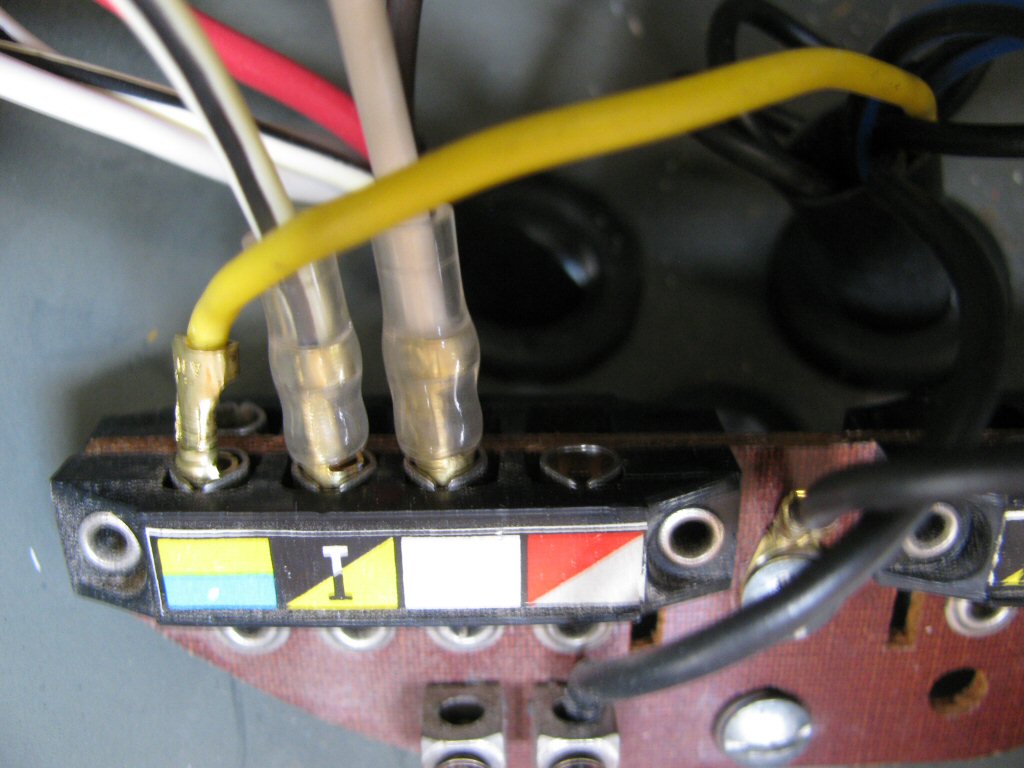
Photo courtesy of Gregory Bender.
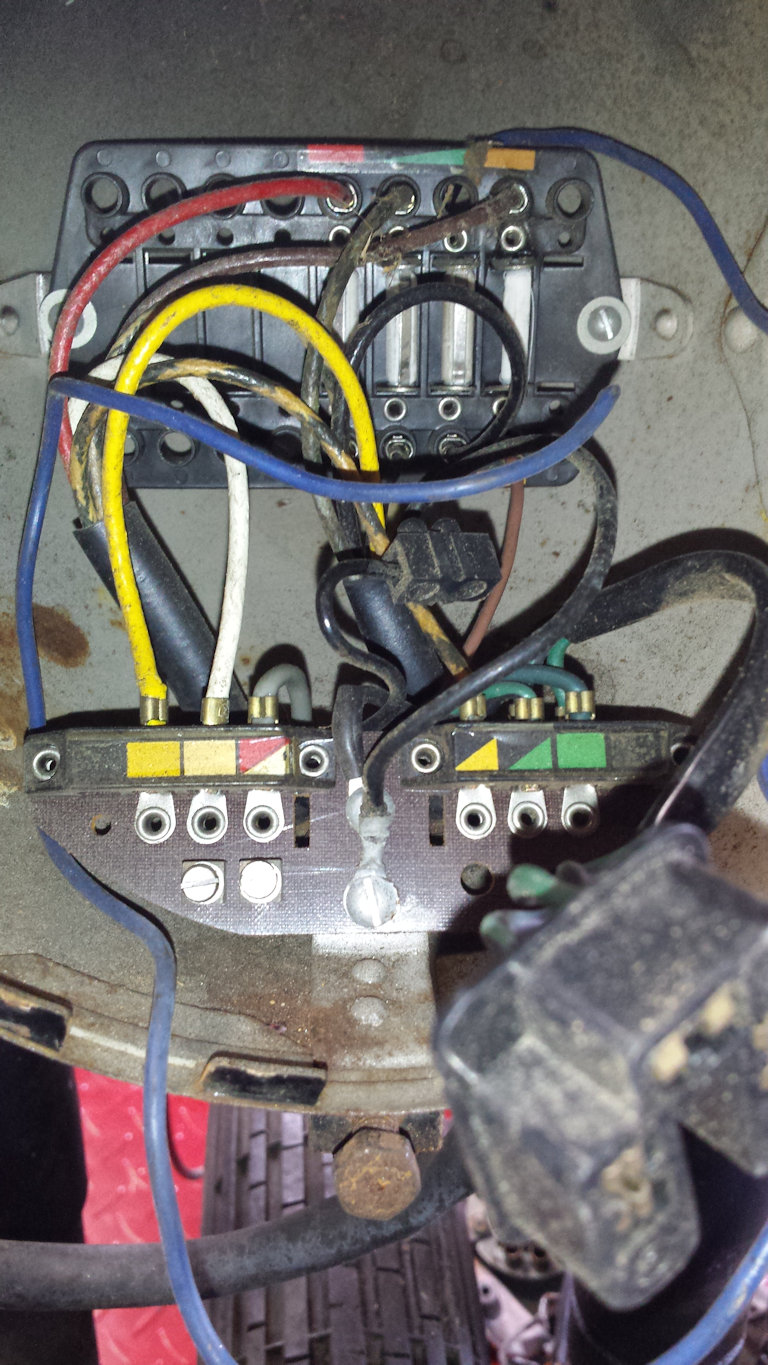
Photo courtesy of Dominic Etzold of Symphony Cycles.
Police dash
- The yellow/black wire with the 4 mm male bullet terminal is plugged into the far right side of the distribution panel: into the left most receptacle (count from the left as when facing the headlight bucket).
- The white wire with the 4 mm male bullet terminal is plugged into the far left side of the distribution panel: into the third left/front receptacle (count from the left as when facing the headlight bucket).
- The white/black wire with the 4 mm male bullet terminal is plugged into the bottom of the fuse block: into receptacles five (count from the left, as when facing the headlight bucket).
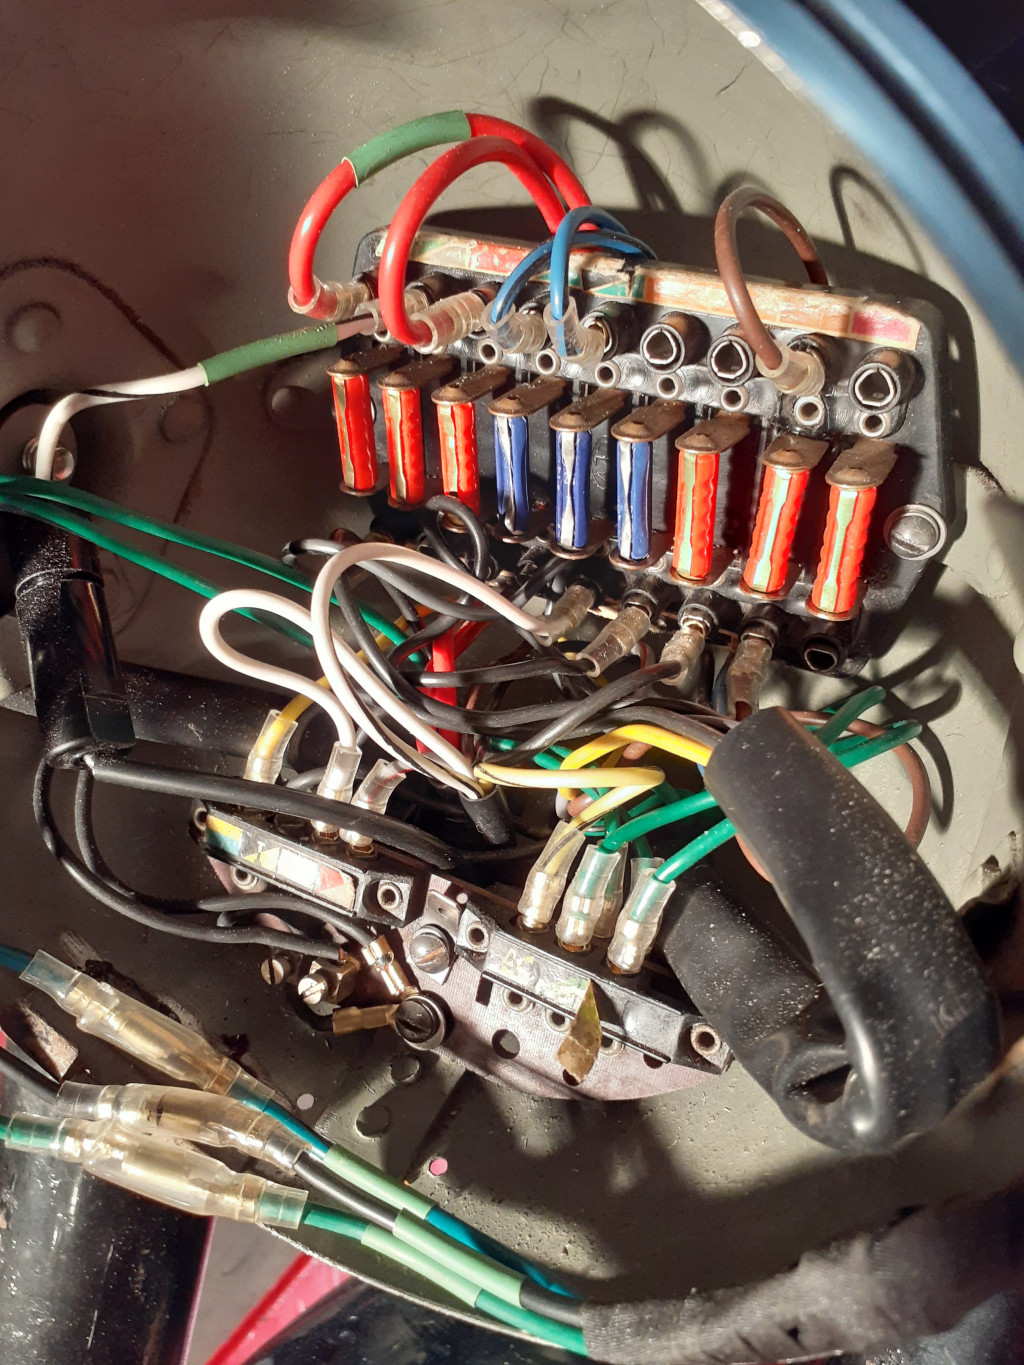
Photo courtesy of Richard Mattrass.
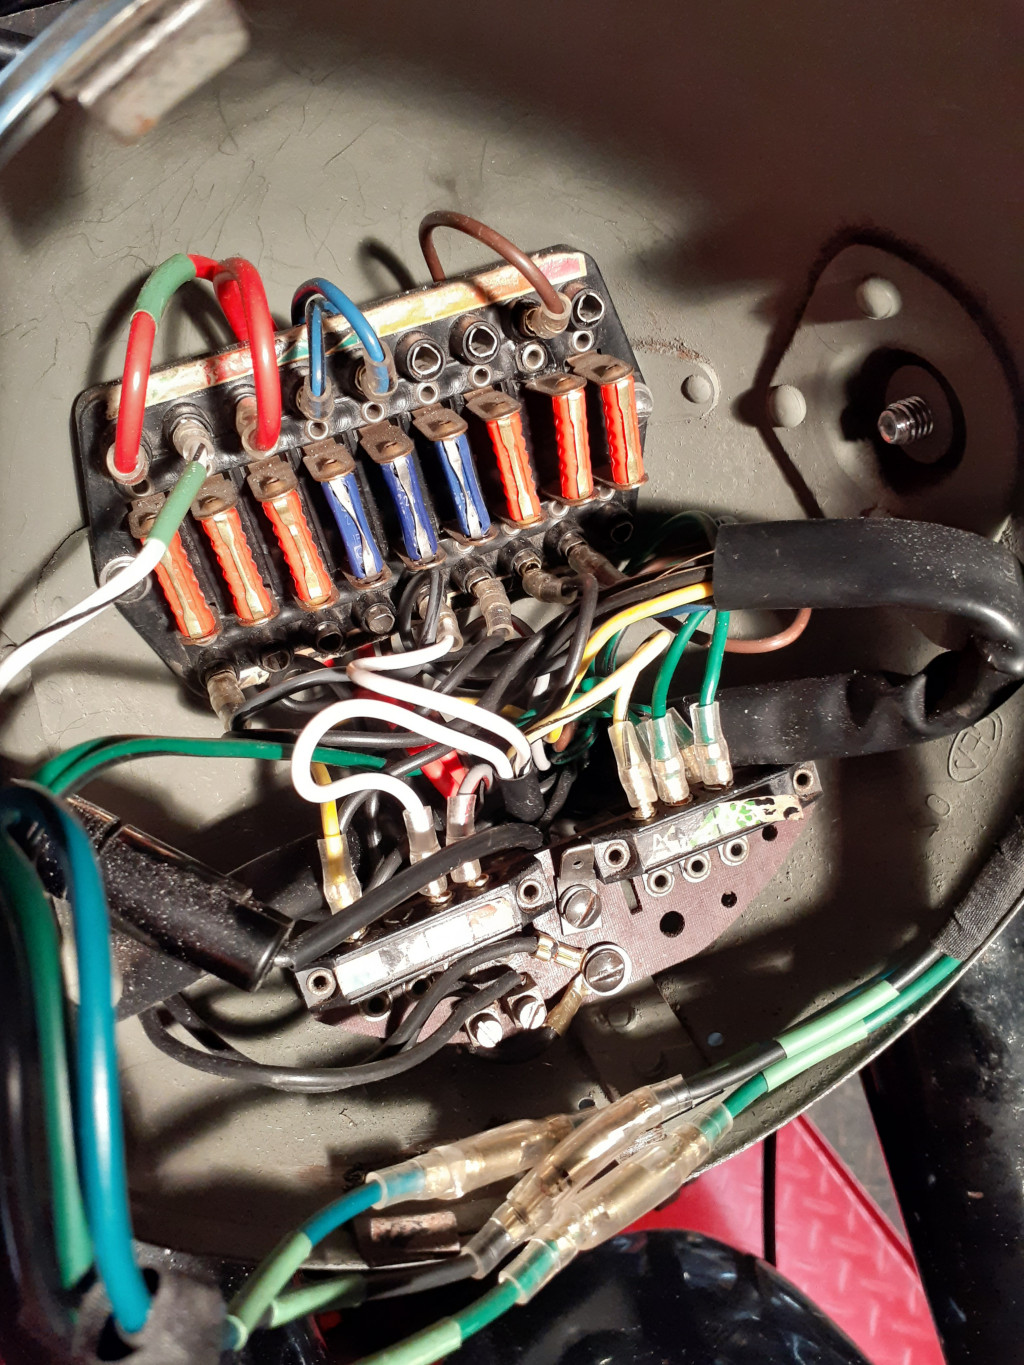
Photo courtesy of Richard Mattrass.