Moto Guzzi V700, V7 Special, Ambassador, 850 GT, 850 GT California, Eldorado, and 850 California Police models
Created:
Updated:
Thanks to Mark Johnson for sending me this information on how to paint a motorcycle yourself. In Mark's own words and photos:
I wanted to share my experience with painting the fenders on my 1973 Eldo and Inder sidecar without using a sprayer. (If you choose to spray, you may obtain the same results but I like this method better.) Using this technique, you can obtain a first-class paint finish that will rival anything a custom paint shop can produce. The project takes about a week, but you need only basic skills and the right procedure. You'll be shocked at the results - I was!
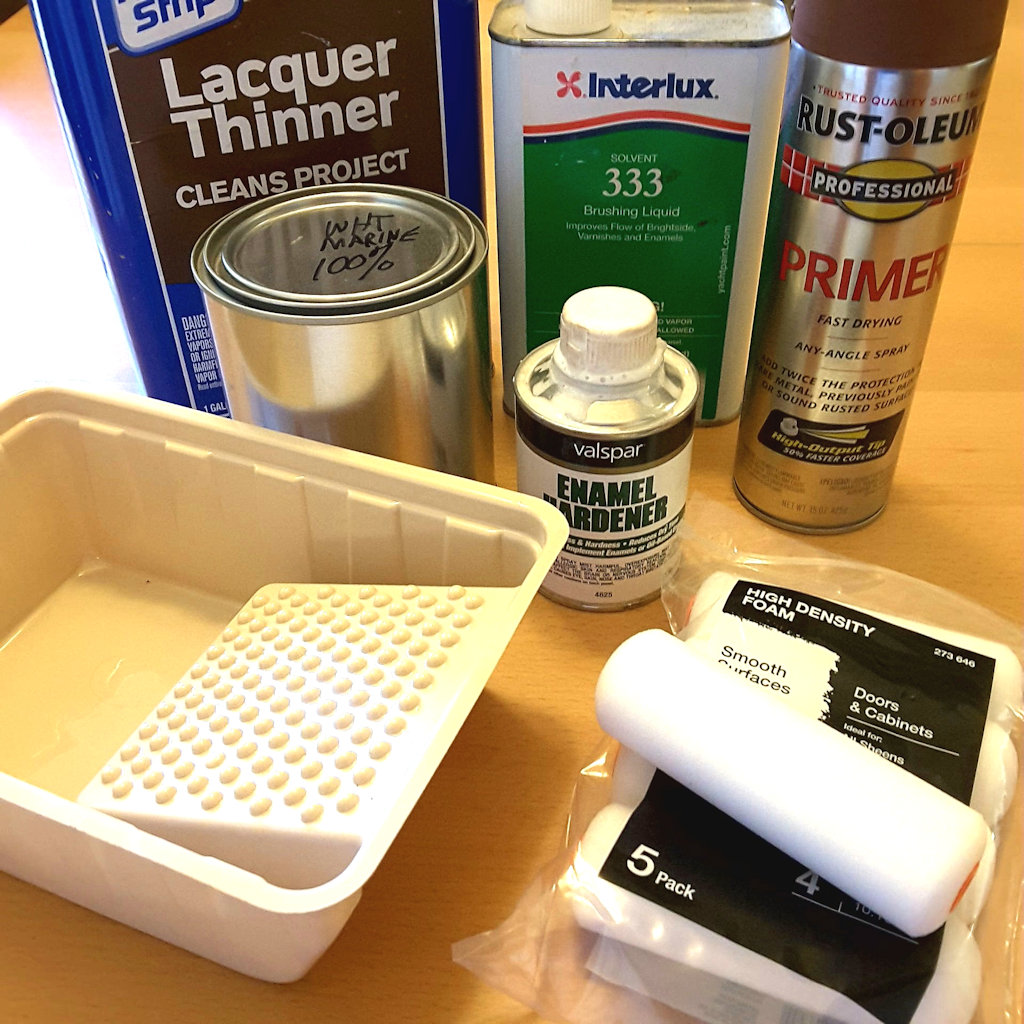
Equipment:
Rustoleum Professional Primer (I like flat red)
High density foam rollers
Foam brushes
Paint trays
Various wet/dry sandpaper grits (400 up to 200)
Paint recipe (see below)
I wanted to change the color of the fender paint on my motorcycle and sidecar this technique, and the results were the same each time - super shiny, super smooth, and super tough finish. For the paint recipe you need the following:
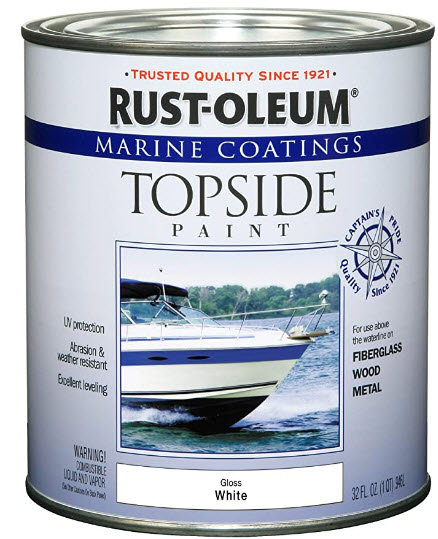
Rustoleum Topside boat paint (offers UV protection and higher gloss - I chose gloss white)
Mineral spirits or lacquer thinner
Interlux brushing liquid 333 or Penetrol (improves flow)
Valspar enamel hardener or equivalent (decreases working time)
Most of the items came from my local Home Depot store, with the exception of the brushing liquid and enamel hardener. Those I ordered on-line. Here's what my collection looked like:
Step 1. Prepare the fender for primer. So remove the fender and sand with wet/dry sandpaper, then fill any chips with glazing compound, etc. I won't tell you how to prepare the fender for primer - you can find that information on YouTube or elsewhere.
Step 2. Apply the primer. Follow the instructions on the can, but basically you want to apply several coats to build up enough material so you can sand it down later. I generally leave the final coat to dry overnight.
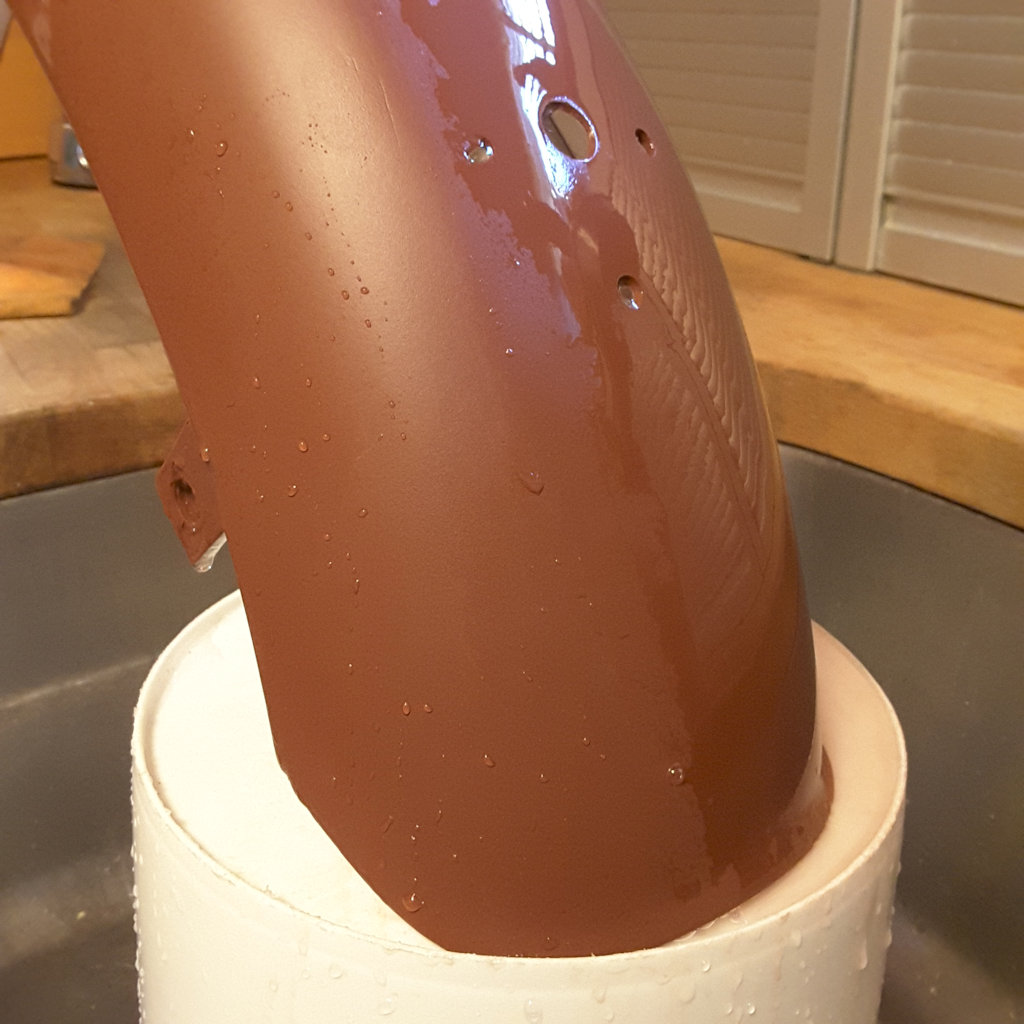
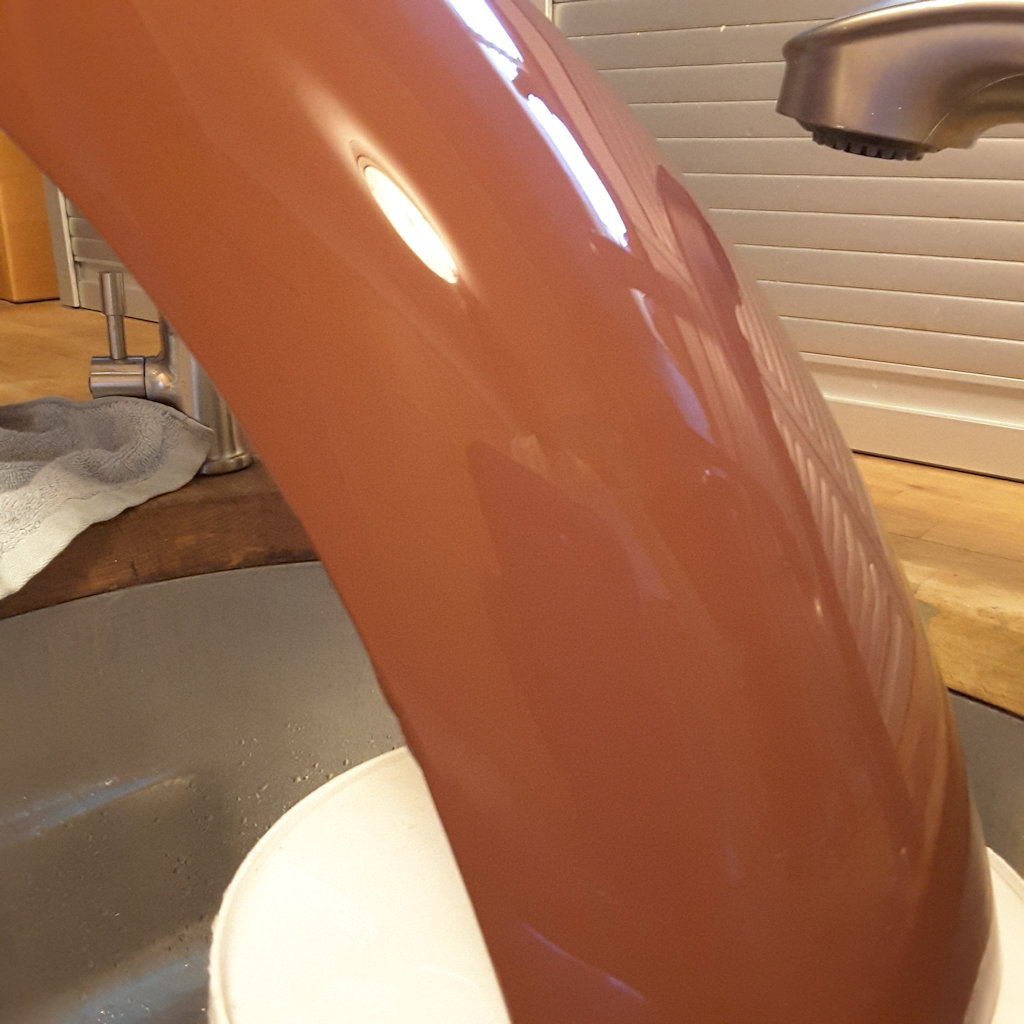
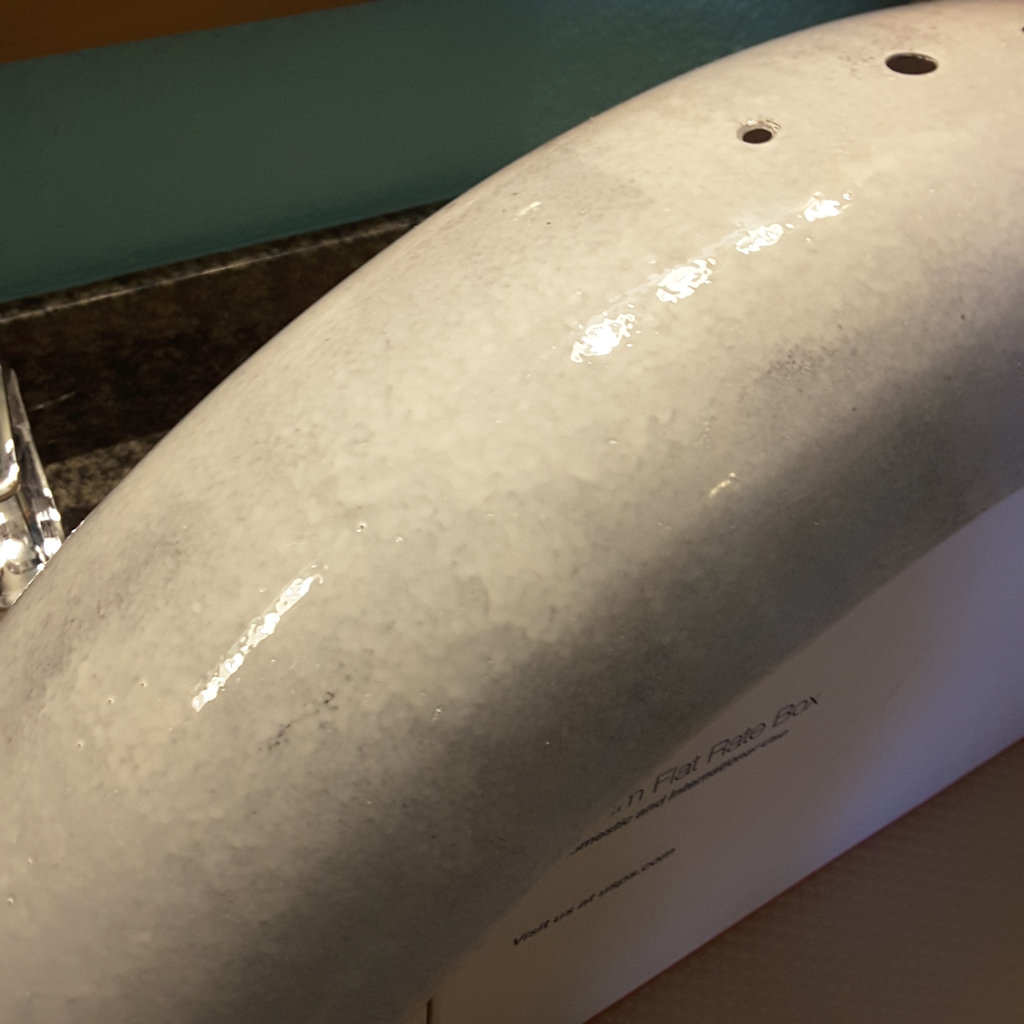
Step 3. Sand the primer. Now place the fender in a sink or similar container and start sanding with something like 240-400 grit wet/dry under running water. Water is essential because it will tell you how close you are to the end. When you first start out, your paint will look like this:
When you get one complete layer of water with no dry spots, you're finished.
Step 4. Mix up the paint recipe. You can mix this in a small tray or combine it in a paint can.
1 part Rustoleum topside boat paint
3⁄4 part mineral spirits or lacquer thinner
1⁄4 part brushing liquid
Splash of hardener
Once combined, the resulting mixture will have the consistency of milk. By the way, the hardener needs to be mixed in and allowed to activate for 30 minutes prior to the next step. TIP: Combine everything but the hardener in a jar so you don't have to make up the recipe for each coat.
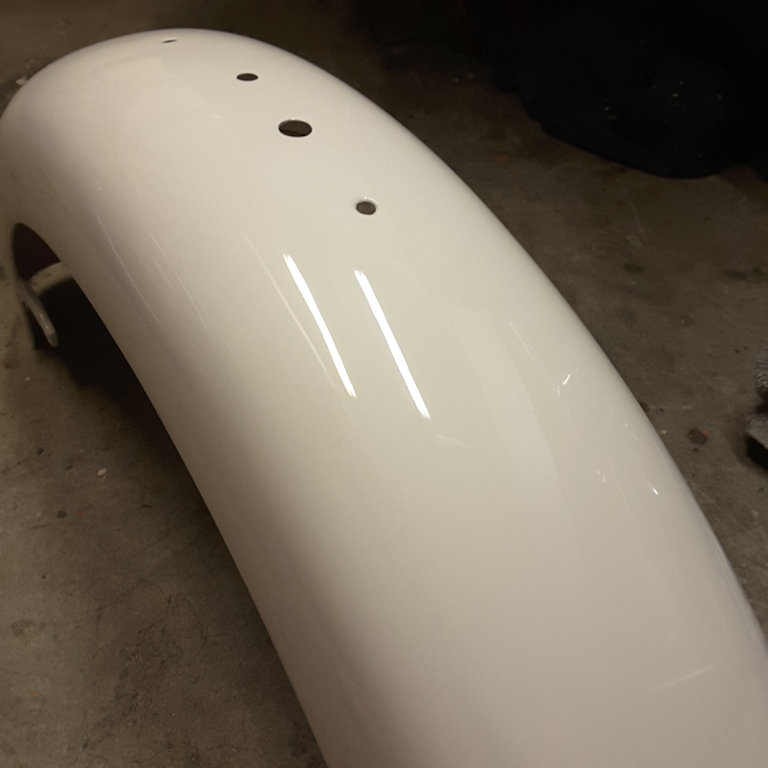
Step 5. Roll on the paint. Roll on a thin coat using the high density foam roller. If it runs, the roller has too much paint. Thinner is always better. Wait 8 hours and then roll on another coat. The finish will look awful at this point.
Fender after the first day - it's supposed to look bad at first.
Photo courtesy of Mark Johnson.
Fender after the first day - it's supposed to look bad at first.
Couple of observations: I've had good results using a foam brush for the final 4 coats and even prefer the results compared to the roller. In truth, I didn't use each of the grits listed above. I probably went to 600, then 1000, then 2000. I've only painted fenders at this point, but originally I found this method being used to paint an entire car - so it might also work for fuel tank and trim as well. Good luck!