Plug-in-ready, relay-equipped harness for adding auxiliary lights to the Moto Guzzi V85 TT
Part number: V85TT-AUX-LIGHTS-BAT-SUPERSEAL
USD $56.00
How to order
Testimonials and reviews
Plug-in-ready, relay-equipped harness for adding auxiliary lights to the Moto Guzzi V85 TT
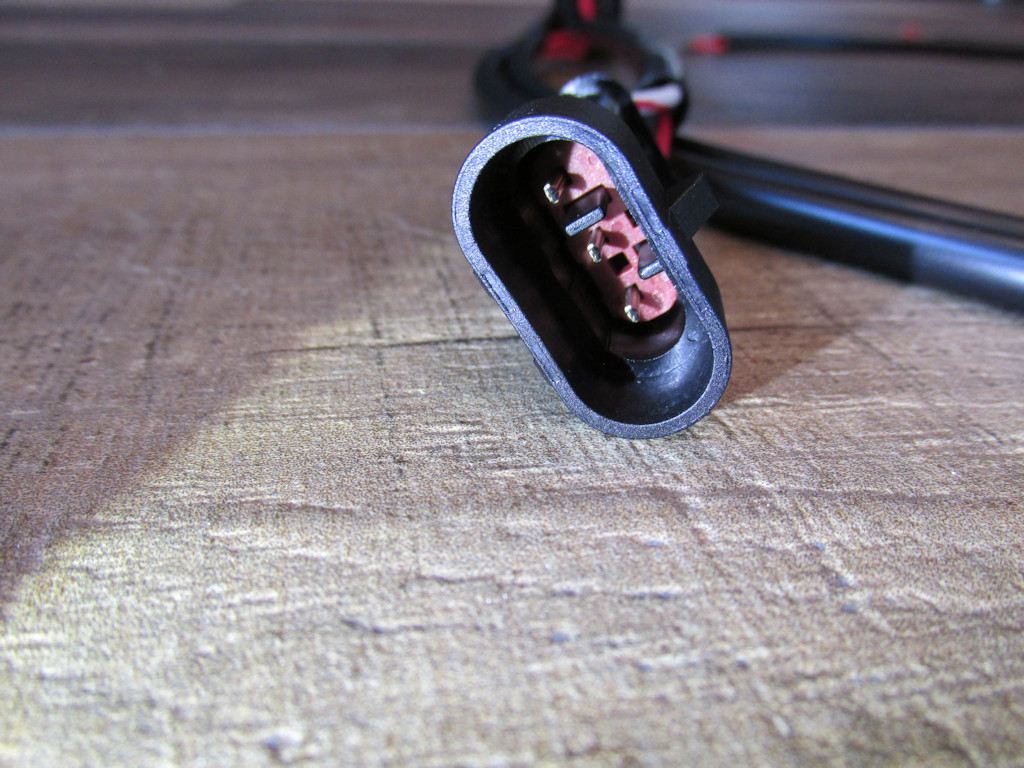
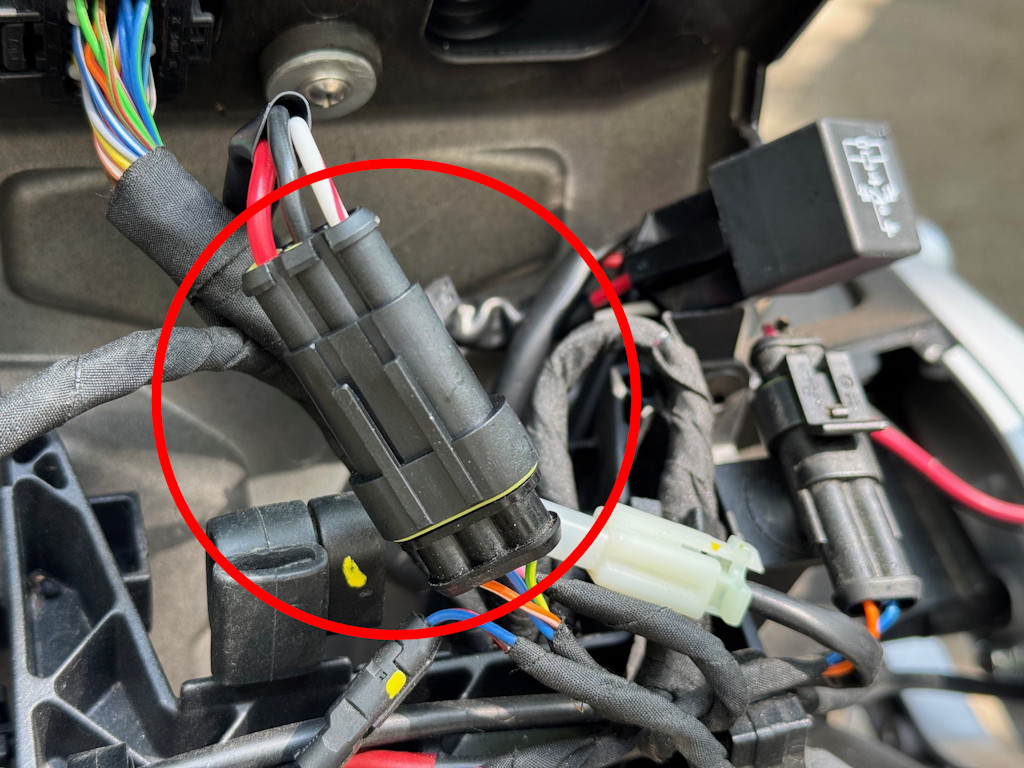
APPLICABLE TO 2024 AND LATER MODELS WITH THE 3-PIN CONNECTOR LOCATED BENEATH THE COVER BETWEEN THE HEADLIGHT AND DASH PANEL - CHECK WHICH ONE YOU HAVE BEFORE ORDERING
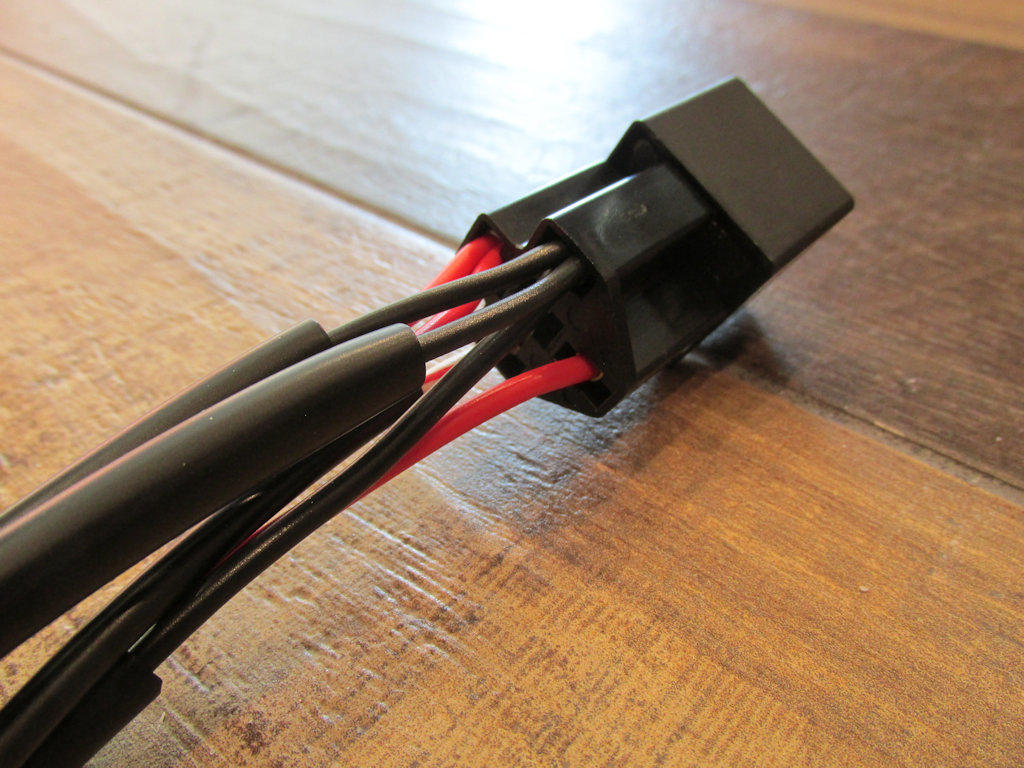
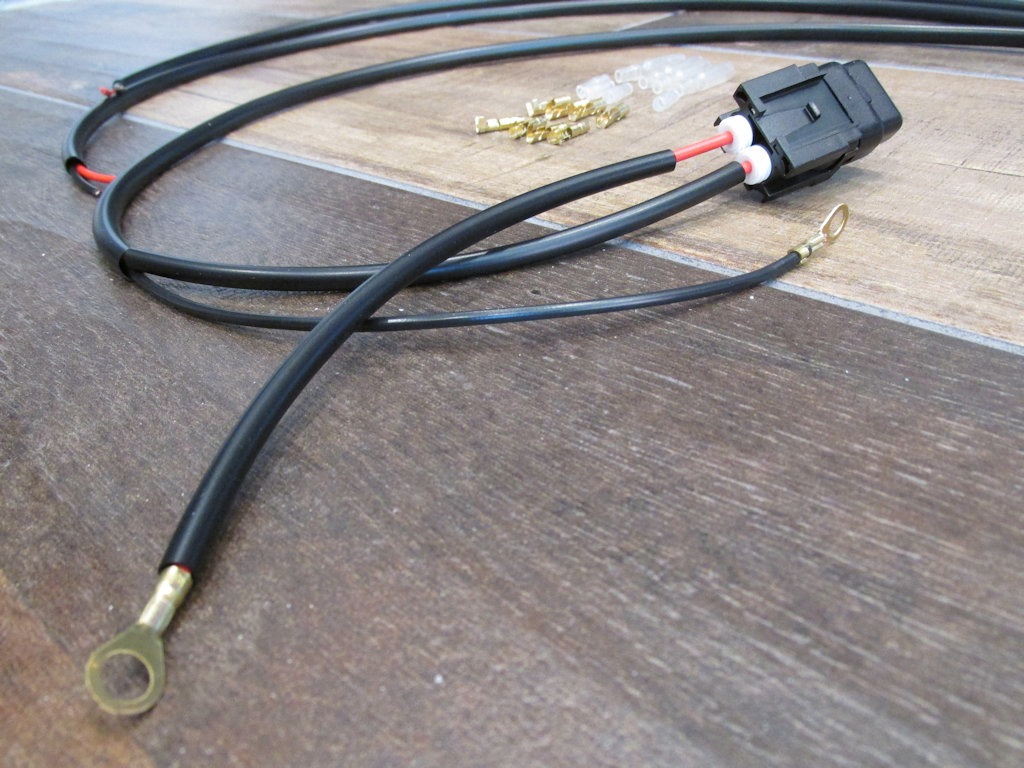
This version runs power directly from the battery, light operation still controlled by the Guzzi handlebar switch. Easily add aftermarket lights to the V85 TT. Plugs directly into the existing OEM Moto Guzzi wiring harness. Operates with the OEM handlebar switch. Extra long wire leads to support various routing and light placement options (1000 mm). Sealed relay. Includes terminals to make connections to auxiliary spot lights, LED lights, etc.
Note: Power to the spot lights flows direcly from the battery. Only the handlebar switch signal
wire passes through the existing Moto Guzzi wiring harness. This is preferred if you are planning to operate high amperage auxilarly lights.
Note: I've been informed that the original Moto Guzzi spot lights were rated at 35 watts each. If the spot lights that you plan to fit have a combined wattage rating greater than 70 watts, then this is the harness that you should use. If the total wattage draw is less than 70 watts, then I recommend my alternative harness that does not require a connection to the battery.
Installation instructions
- Remove the cover that fits between the headlight and the dash.
- Identify the 3-pin connector that is not currently connected to a mating 3-pin connector. It may be zip-tied and tucked away.
- Connect the 3-pin plug on the new harness to the OEM Moto Guzzi 3-pin connector.
- Route the two pairs of red and black wire extensions; one pair will go to each light.
- Route the wire bundle with the inline fuse back to the battery.
- Fit the relay and associated wiring under the cover and replace the cover.
- Make the wire connections at each light with the provided bullet terminals.
- Black to ground/earth.
- Red to power.
- Feel free to cut the sheathing and wiring to the length needed.
- Make the wire connections at the battery.
- Black to ground/earth.
- Red to power.
Operating instructions
The following instructions were extracted from the Moto Guzzi owner's manual.
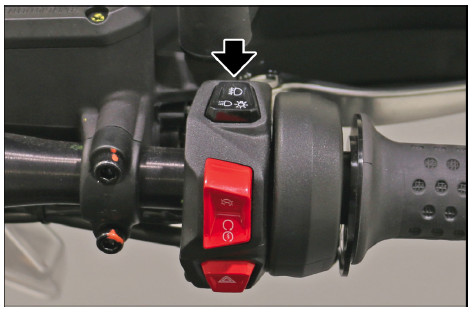
Daytime/night lights switch
This button allows to select the use mode of the daytime running lights (DRL), night lights (low / high beams) and the activation of the fog lights (if applicable).
- Press the button briefly to cycle through the modes available (daytime/night-time lights).
- A long press of the button will activate the fog lights regardless of the lighting mode active. (if applicable)
- A further long press will deactivate the fog lights. (if applicable)