GuzziDiag HowTo - A tutorial for beginners
Moto Guzzi Quota 1000 and Quota 1100 ES models
Thanks to beetle
for posting this information on the Wild Guzzi forum. In beetle
's own words:
This is a basic howto for the GuzziDiag suite of tools. This howto will show you how to connect, read (backup) your existing map, write (flash) a new map and perform a TPS reset. This uses the Windows versions, but Mac & Linux versions function the same.
Download the software
For the 5AM ECU, you will need the following software from the GuzziDiag page:
For the 15M ECU you will need these:
Each is a standalone program that works independently of each other and does not require any extra software.
Purchase the cables
You will also need the two cables. They are available from various resellers on the net.
EDIT: Lonelec is the best source on the net. They sell a kit that inlcudes both cables and is guaranteed to work:
- The OBD2 KKL 16 pin to USB cable with the FTDI chip. This will come with the drivers or they too can be downloaded.
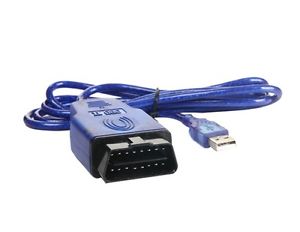
Photo courtesy of
beetle
. - The Fiat 3 Pin to 16 pin Adapter
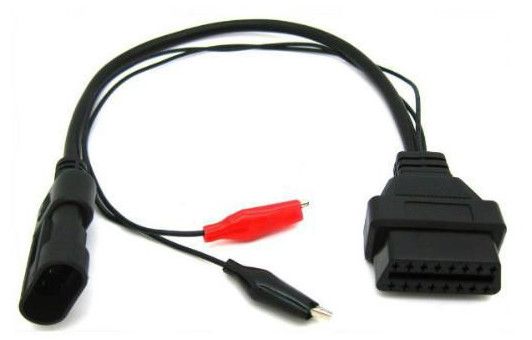
Photo courtesy of
beetle
.
Connect the cables
To connect to the bike, connect the two 16 pin connectors on the cables together and the 3 pin cable to the diagnostic port. For example on the Griso, it's located under the seat near the back right.
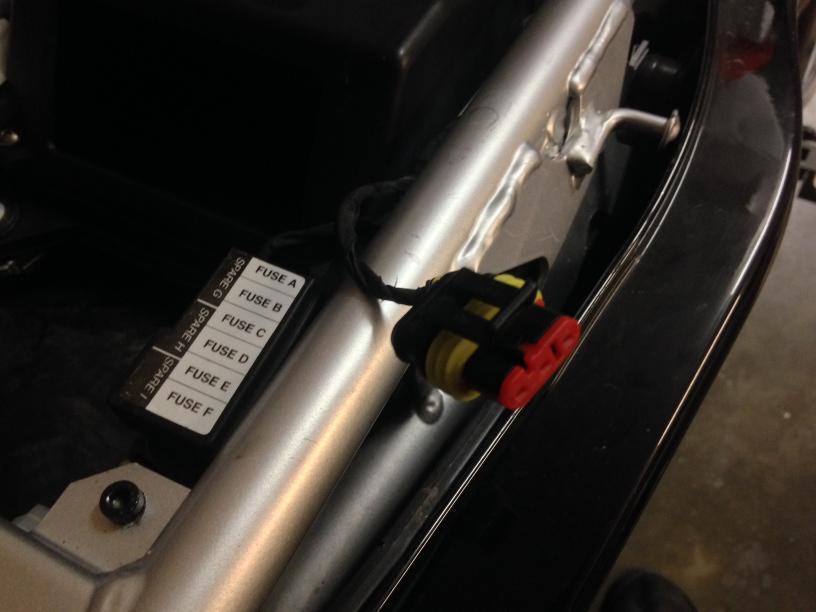
Photo courtesy of beetle
.
Attach the clips from the 3 pin cable to the battery and plug the USB cable into a USB port on your computer.
A LED on the OBD2 cable will indicate power is connected.
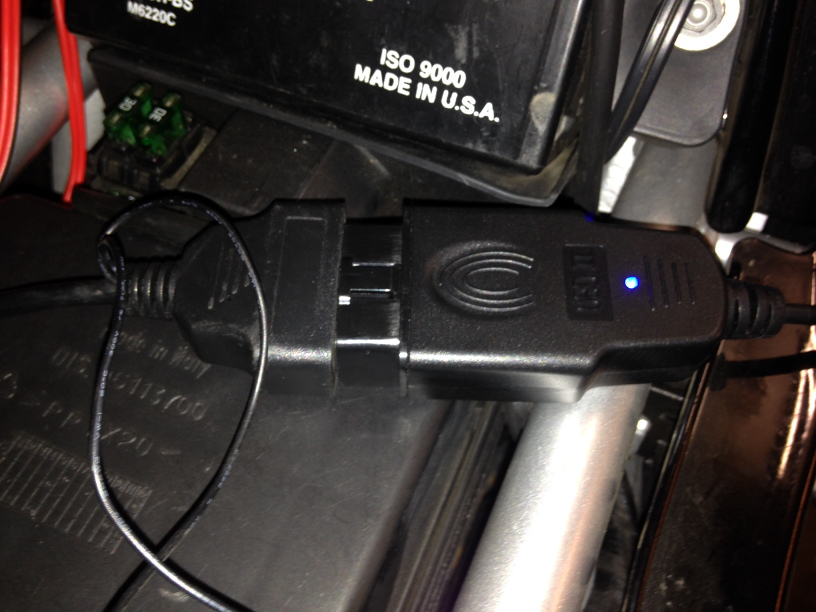
Photo courtesy of beetle
.
When you are connected to the ECU with one of the programs, you will get a nice display on your instruments.
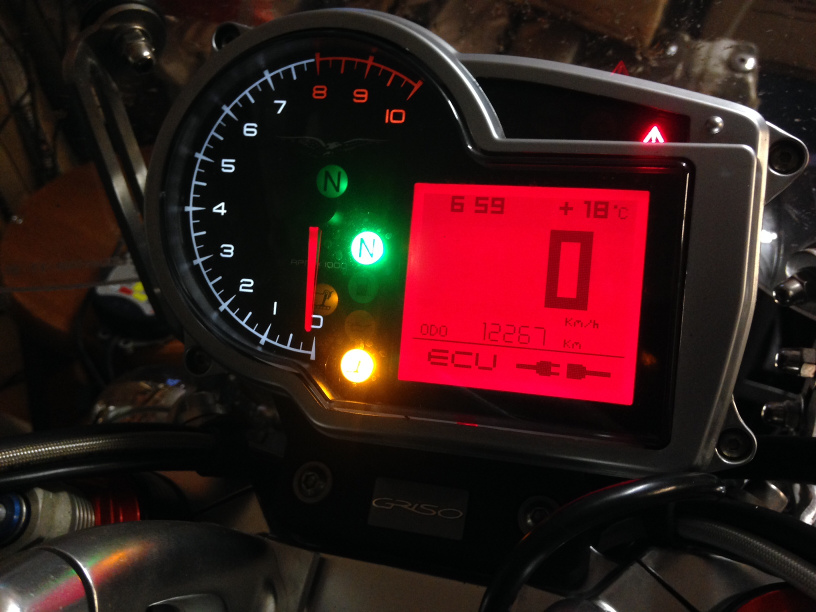
Photo courtesy of beetle
.
Right, next we will do some stuff....
Read and backup your existing map
To read and backup your existing map, open the IAWReader. Your computer may have multiple COM ports, so select the correct one from the drop-down box. it is usually the last one or highest number. if it doesn't connect at first, keep trying different ports. In my example, I only have one, COM4.
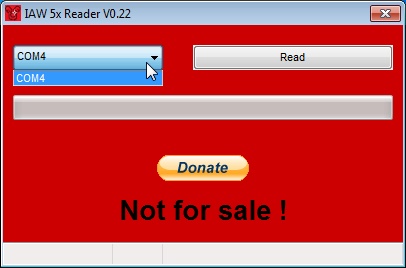
Photo courtesy of beetle
.
Then, click on read
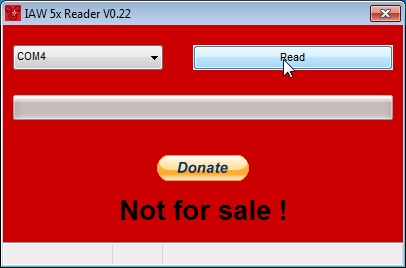
Photo courtesy of beetle
.
A dialog box will open, and here you can select the folder where you want to save the .bin file. You can name it anything you like.
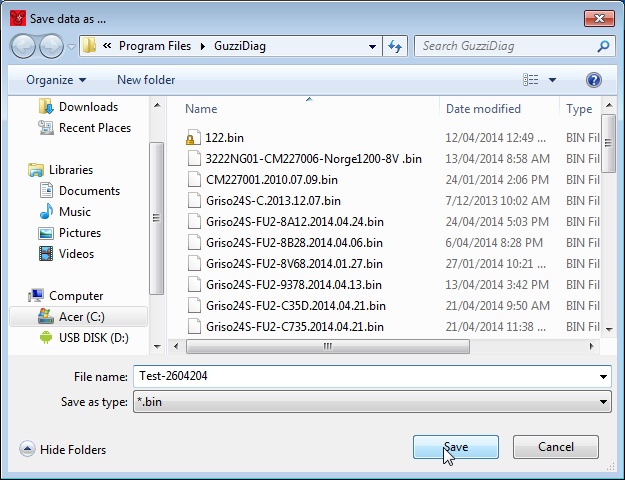
Photo courtesy of beetle
.
Click save
. You will then get:

Photo courtesy of beetle
.
Turn your keyswitch to on
. Do not start the engine. Reader will start downloading. It will take 15 minutes to backup the map.
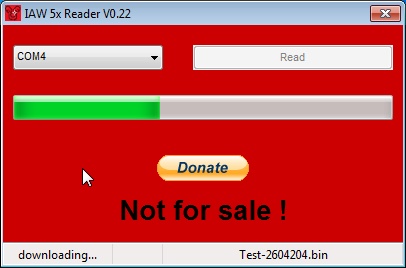
Photo courtesy of beetle
.
When it has finished, it will ask you to switch off your keyswitch. Obey.
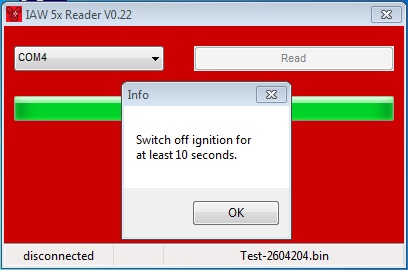
Photo courtesy of beetle
.
Done!
Write or flash a new map
To write or flash a new map, start the Writer program. You can select your COM port here as well.
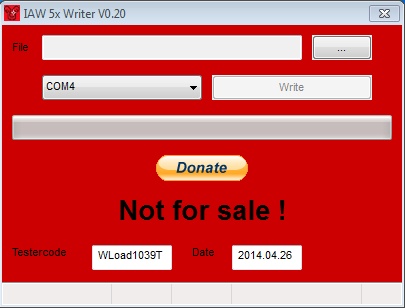
Photo courtesy of beetle
.
Click on the button with the 3 dots, and you will get a dialog box where you can browse to and select the .bin file you wish to flash by clicking Load
.
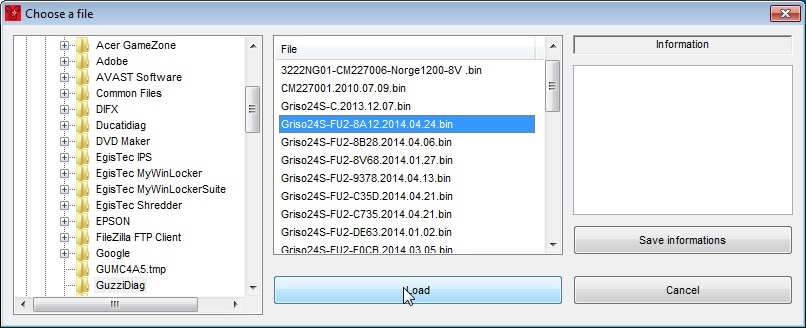
Photo courtesy of beetle
.
Then, click Write
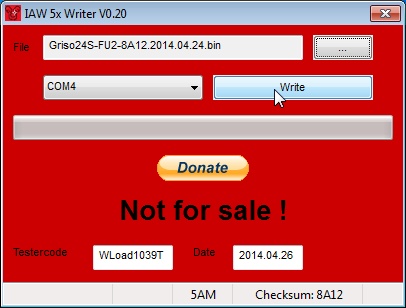
Photo courtesy of beetle
.
Same as before, it will ask you to switch your keyswitch on.
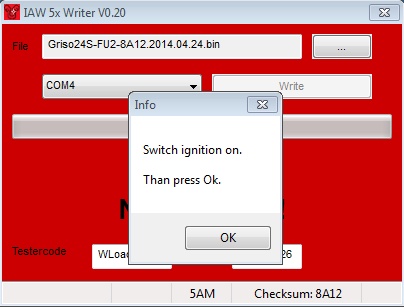
Photo courtesy of beetle
.
It will start the upload. Note the message in the bottom left corner uploading
. It takes 3 minutes. It will then change to programming
as it writes the file to the ECU.
It will then show a message that it was successful.
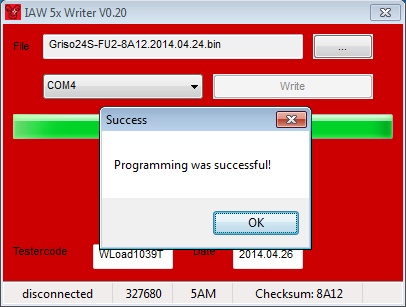
Photo courtesy of beetle
.
Click OK
and switch off your keyswitch.
Done!
Reset your TPS
You will then need to reset your TPS. Open the GuzziDiag program.
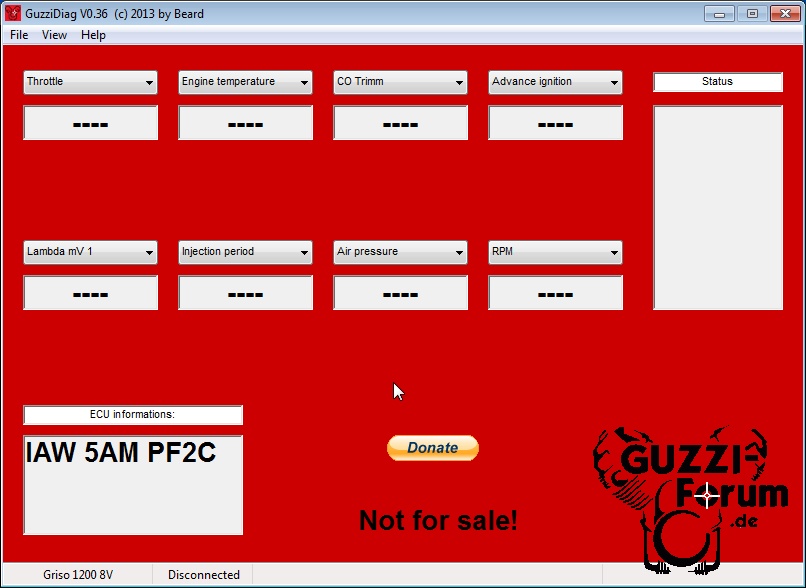
Photo courtesy of beetle
.
Click File
-> Setup
to configure the software. It only needs to be done once.

Photo courtesy of beetle
.
The GuzziDiag settings dialog box opens. Here you can select language, COM port and bike type.
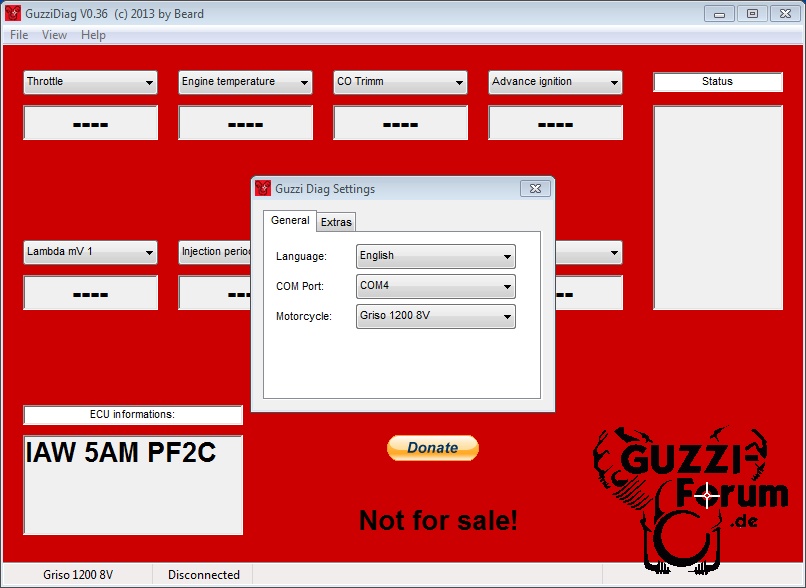
Photo courtesy of beetle
.
Next we want to connect to the ECU, so click File
-> Connect
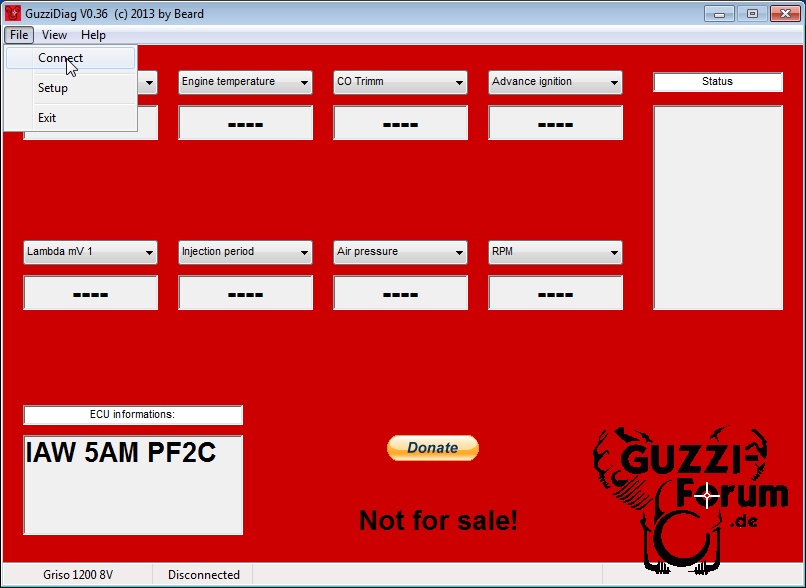
Photo courtesy of beetle
.
It will ask you to switch on your keyswitch and click OK
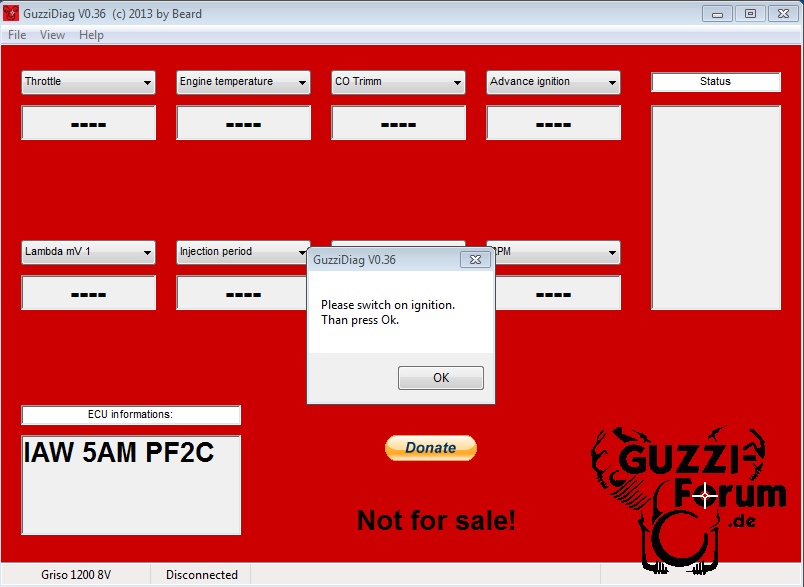
Photo courtesy of beetle
.
You'll notice there are 8 drop down boxes to select various readouts. Select whatever you wish.
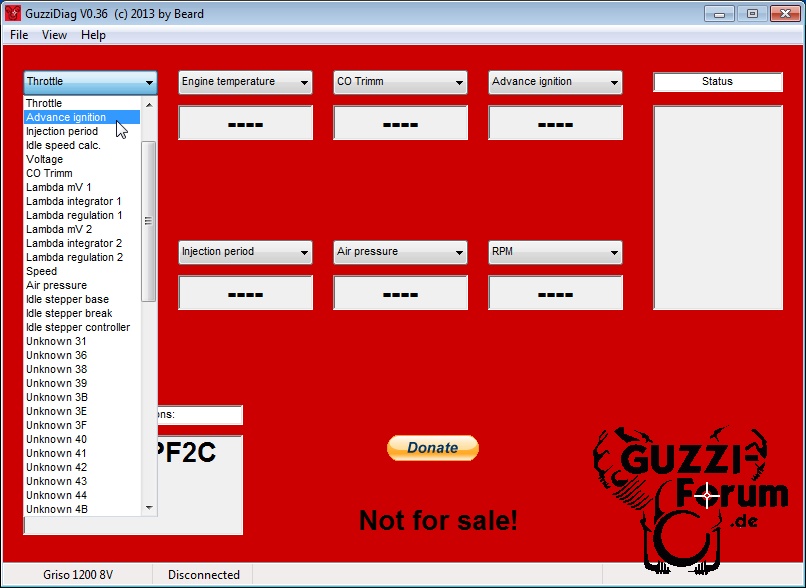
Photo courtesy of beetle
.
You can see here after uploading the map, my TPS (Throttle) is slightly out. It should read about 4.7
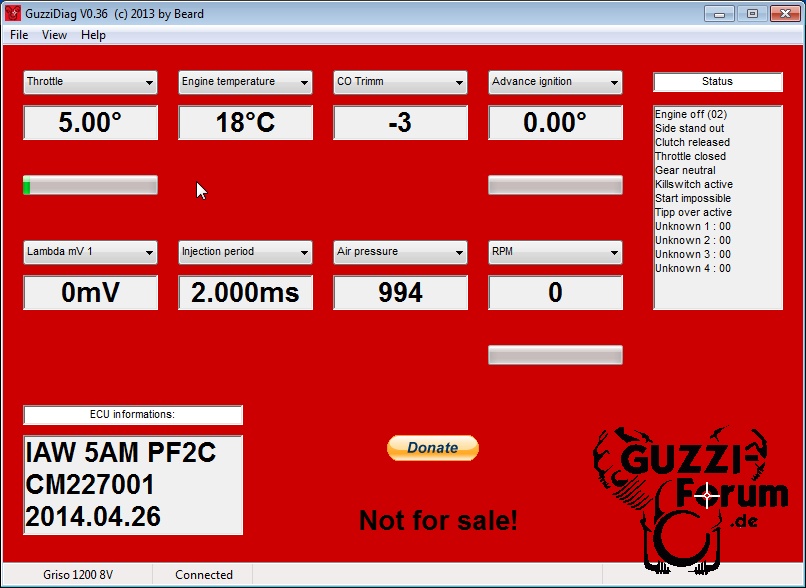
Photo courtesy of beetle
.
Let's reset it! Click on View
-> Actors
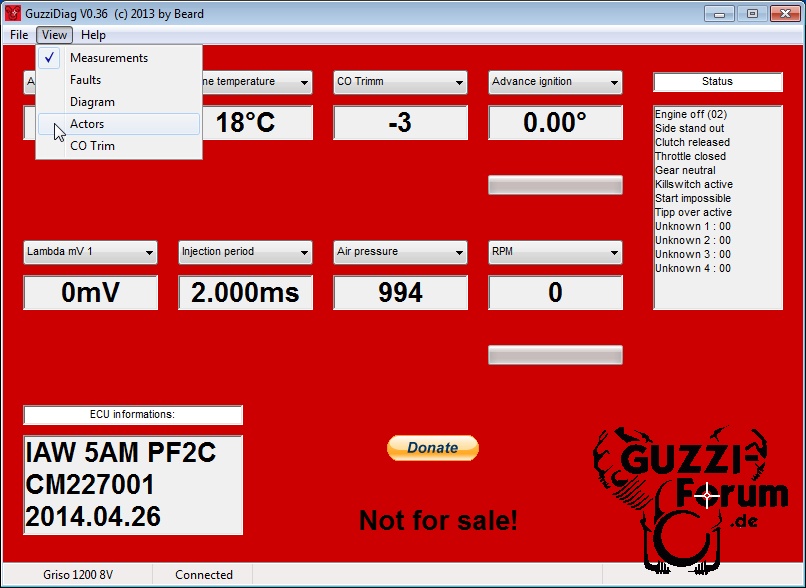
Photo courtesy of beetle
.
You will be prompted to ensure the engine is not running. Click OK
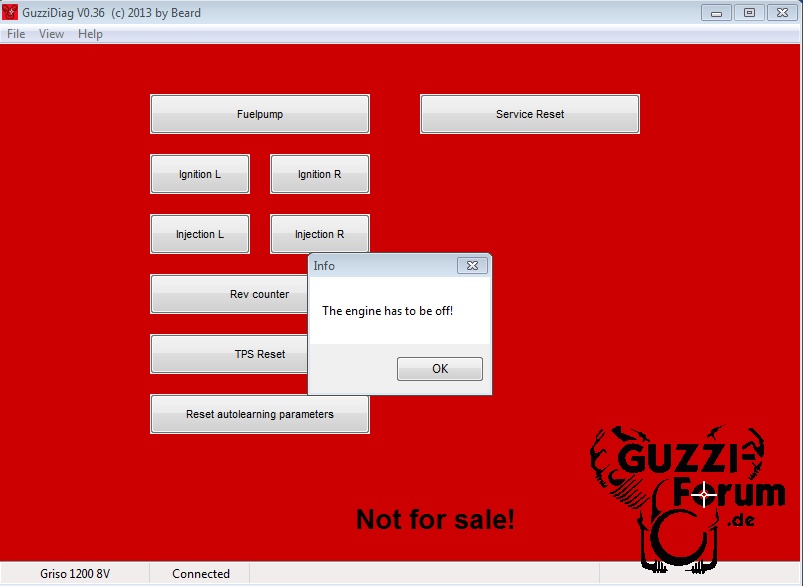
Photo courtesy of beetle
.
Next, reset the TPS. Click on the TPS reset
button.
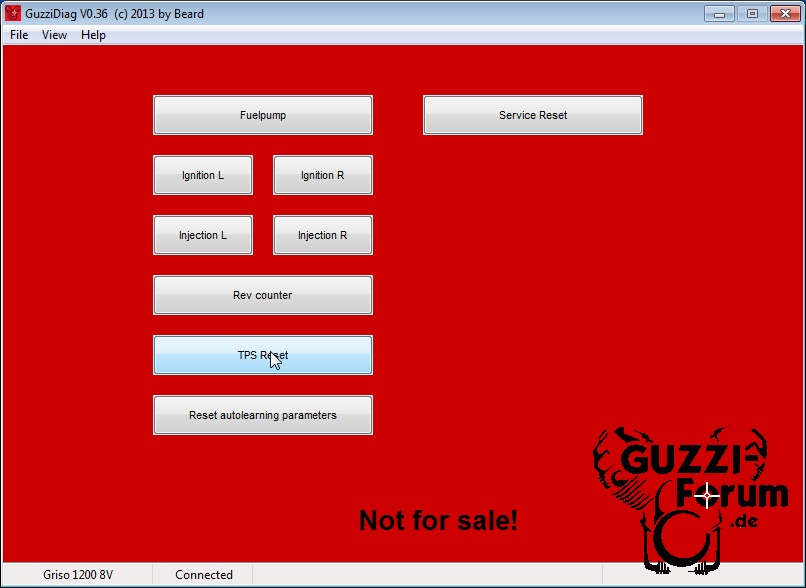
Photo courtesy of beetle
.
Then, click on View
-> Measurements
, and Voila! TPS reads correctly.

Photo courtesy of beetle
.
If you want to see some data change, you can start your engine and check out the readouts. Here I simply twisted the throttle (engine was not running).
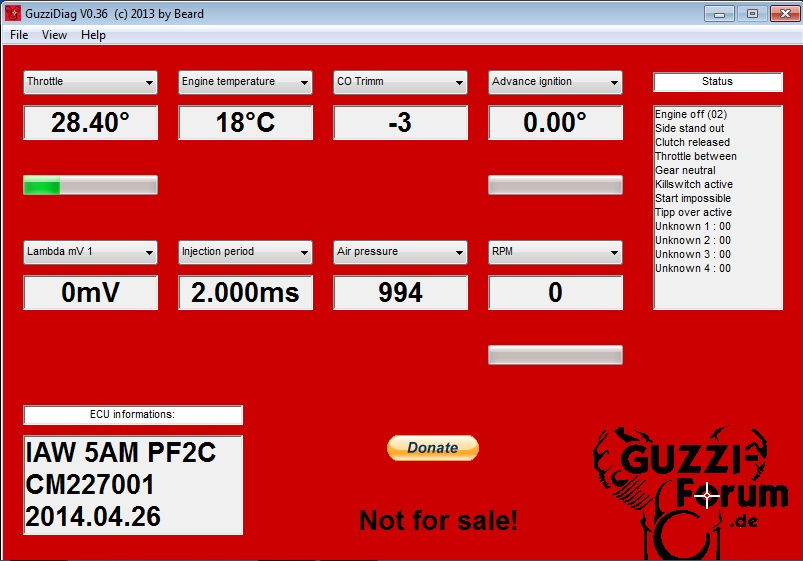
Photo courtesy of beetle
.
Once you're done, click File
-> Disconnect
and you will be prompted to switch off the keyswitch. Switch off the key and click OK.
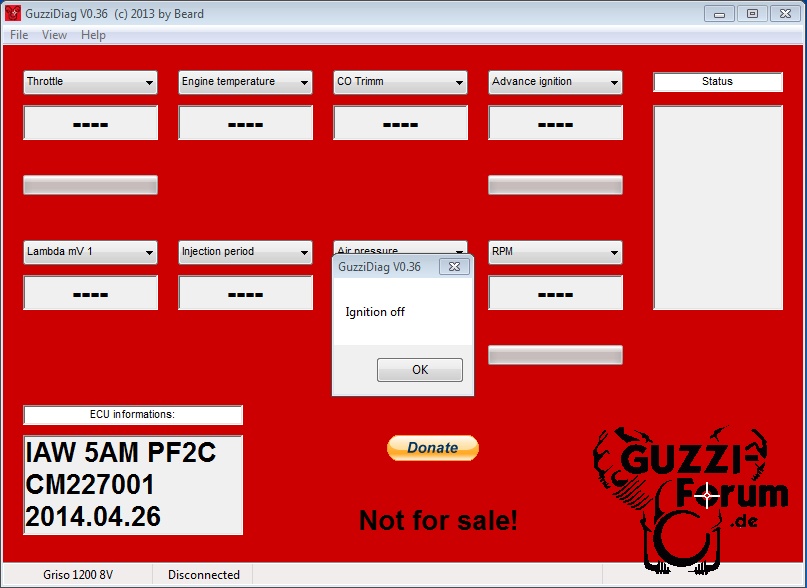
Photo courtesy of beetle
.
Done!
Adjust the CO trim
If you load a new map or do something simple to your stock map like switch of the lambda sensor, you may find you need to adjust the CO trim for a smoother idle or less smelly idle (too much fuel).
To do this with GuzzDiag, get your engine up to temperature (which is 60° celsius). Go for a short ride or let it idle with GuzziDiag connected so you can monitor the engine temp.
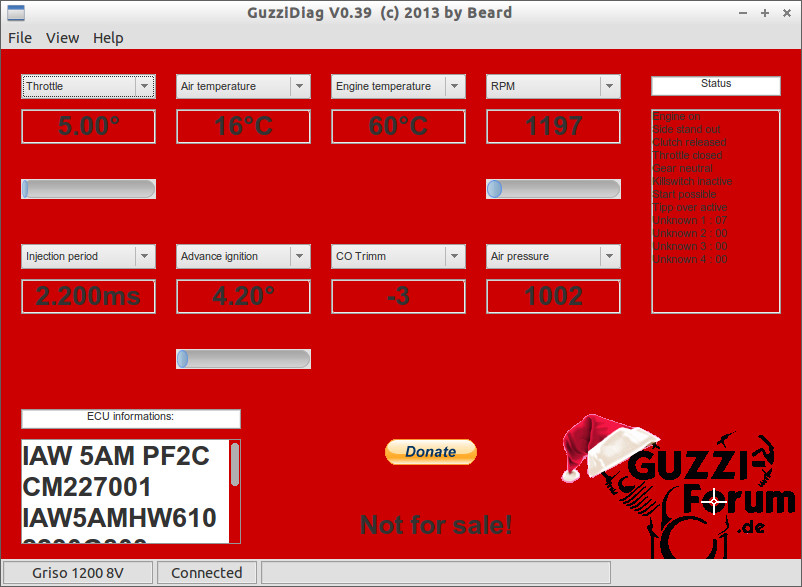
Photo courtesy of beetle
.
Once up to 60°C, hit the kill switch. Click on View
-> CO Trim
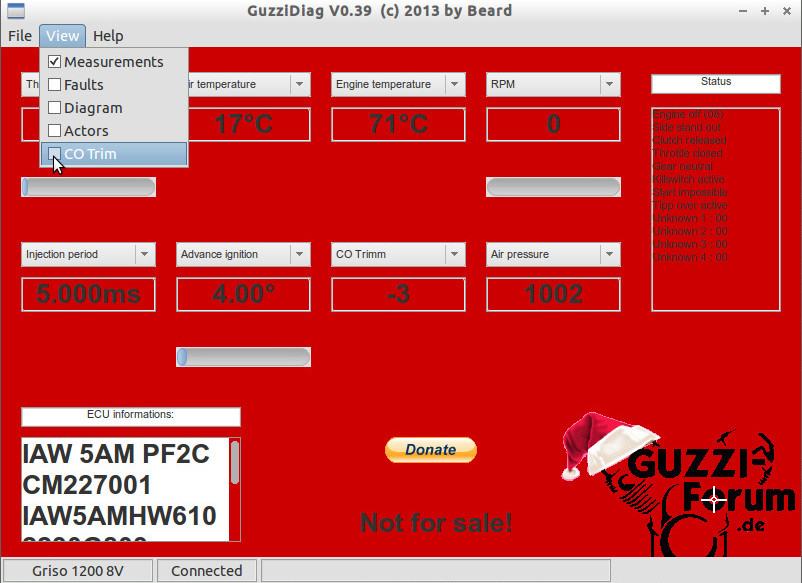
Photo courtesy of beetle
.
You will get the following dialog box. Click OK
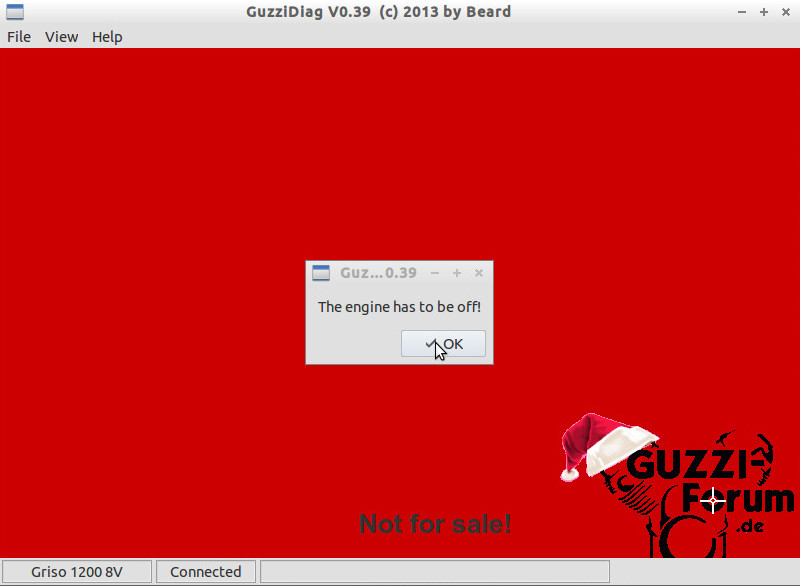
Photo courtesy of beetle
.
You will then be presented with the CO trim menu. Click Start

Photo courtesy of beetle
.
You will get a dialog box that asks you to start your engine. Click Ok
and start 'er up.
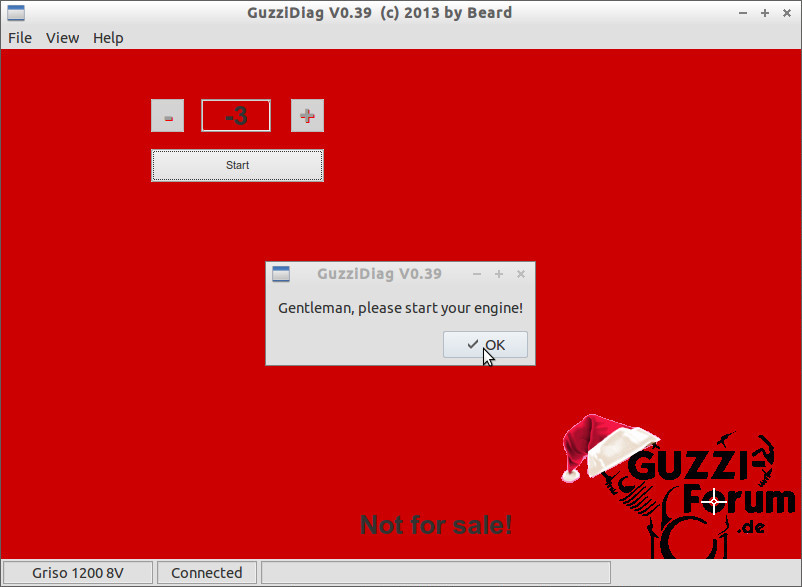
Photo courtesy of beetle
.
With the engine running, click the plus +
or minus -
button to adjust the CO trim. You can go up to +128 or down to -128.
For starters, I recommend going to a minus number, say -20. Click Finish
and take note of what your idle RPM does.
If the idle drops or gets rough
, click Start
again. At this point GuzziDiag will ask you start your engine again, but as it is already running, simply click OK
and adjust your CO trim number to be more positive by clicking the plus button. Go up by 5. e.g., if you are at -20, go to -15. Click Finish
and note idle. Repeat as necessary until idle is smooth and at your required idle RPM.
Try not to let the engine get too hot. You can't hurt anything by adjusting the CO trim, so if you feel you haven't quite got it right, let the engine cool off and start again. Of course, you can use a fan to assist with cooling.
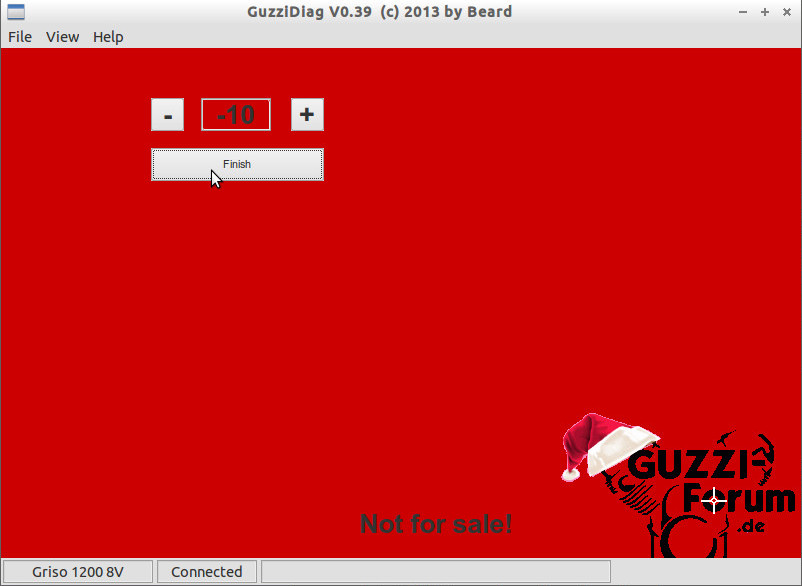
Photo courtesy of beetle
.
Done!