Moto Guzzi V700, V7 Special, Ambassador, 850 GT, 850 GT California, Eldorado, and 850 California Police models
Created:
Updated:
There are numerous approaches, techniques, and processes described on this page. Read through them and pick your favorite.
Plugs for the petcock holes
Thanks to Charlie Mullendore of Antietam Classic Cycle for the following recommendation:
The rubber plugs were purchased at the local Ace Hardware, any good hardware store should have them. I've seen them in the hardware section of the local Lowe's. You want the black rubber not cork ones. The [petcock] ones are 3⁄8 inch at the smaller end, 9⁄16 inch at the larger end.
Thanks to Hayden for the following recommendation:
For plugging the bottom of the tank, plastic peg spiles for cask beer are 13 mm diameter at the fat bit. Fuel tap theads are 12 mm which makes it a snug screw in fit. I went to a local beer brewer who gets them in boxes of 1000 - he just chucked over a handful.
Heat the spiles in hot water to soften and they screw right in.
Hardwood ones are available which should be ok, but softwood spiles are not as they are used to seal the barrel but vent gasses. Hardwood spiles do not breath and expand and seal the hole apparently.
Plastic peg spile for cask beer. Can be used to seal the petock holes on the bottom of the tank.
Photo courtesy of eBay auction.
Plastic peg spile for cask beer. Can be used to seal the petock holes on the bottom of the tank.
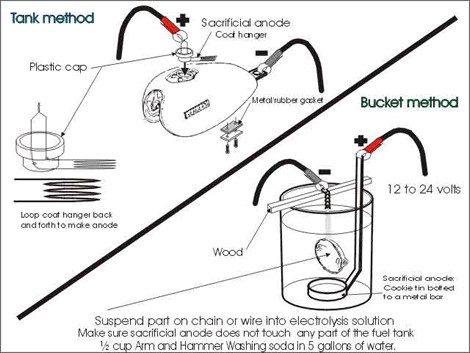
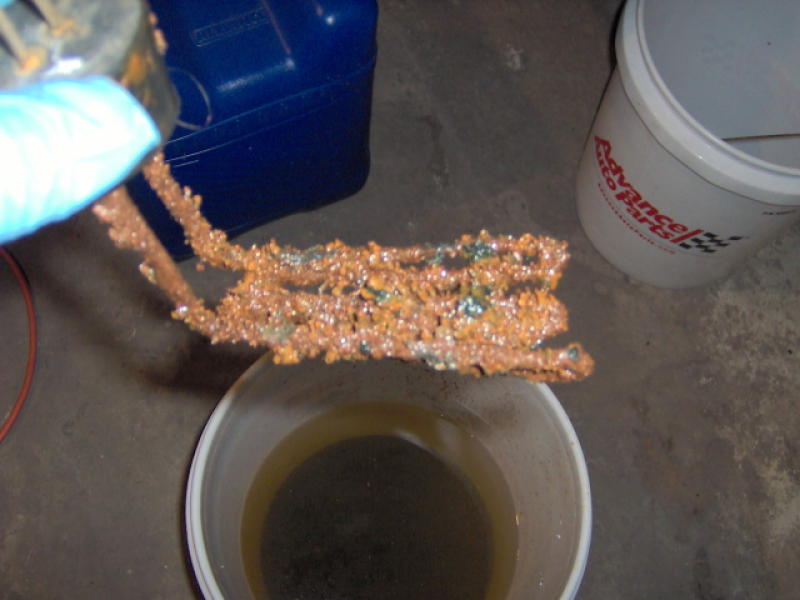
Charlie followed instructions he found online. Here are a few notes and several photos from Charlie....
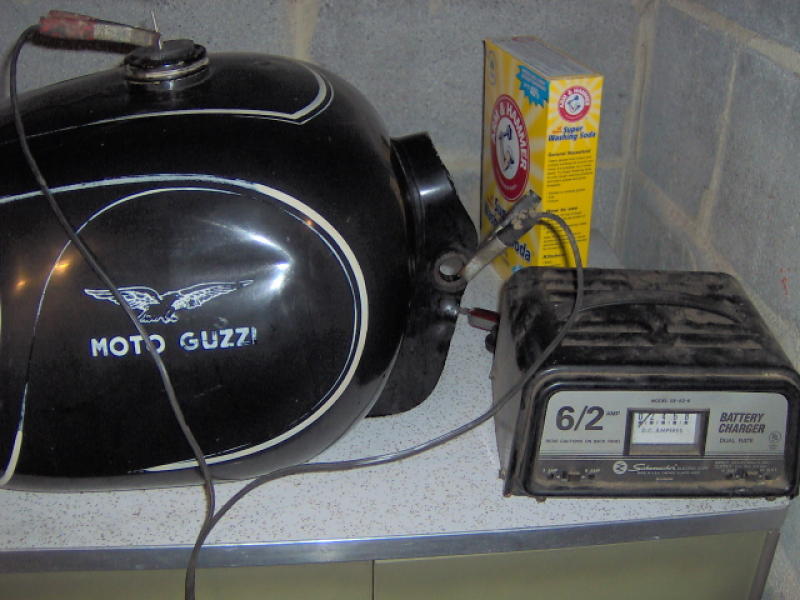
You want Arm & Hammer Super Washing Soda which is normally found at the supermarket in the aisle with the laundry detergent. Comes in a yellow box. I bought two large (5 gallon?) plastic buckets to mix the solution in and to drain it back into when done. Used a large plastic cup to transfer the solution from the bucket to the tank.
Charlie provided these URLs and image from other websites:
I've had no recurrence of rust so far, but it is winter (low humidity) and I do keep the tank full as much as possible.
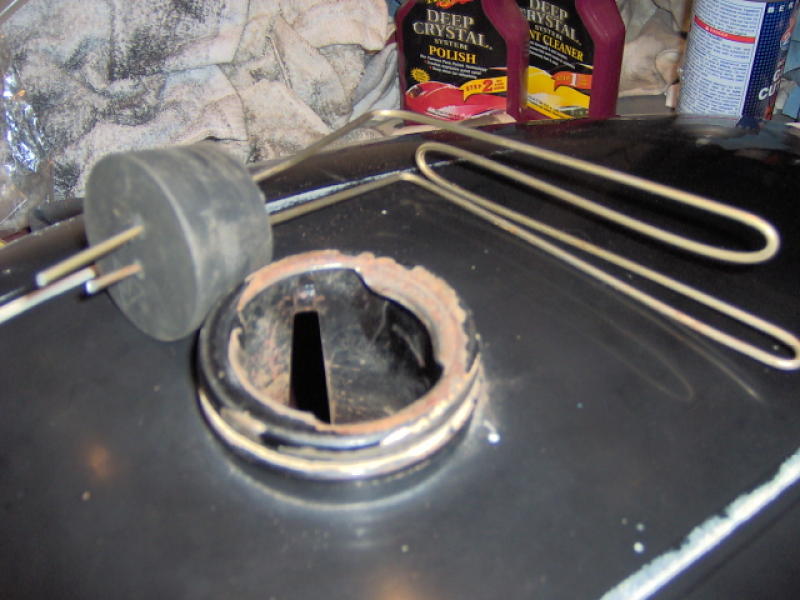
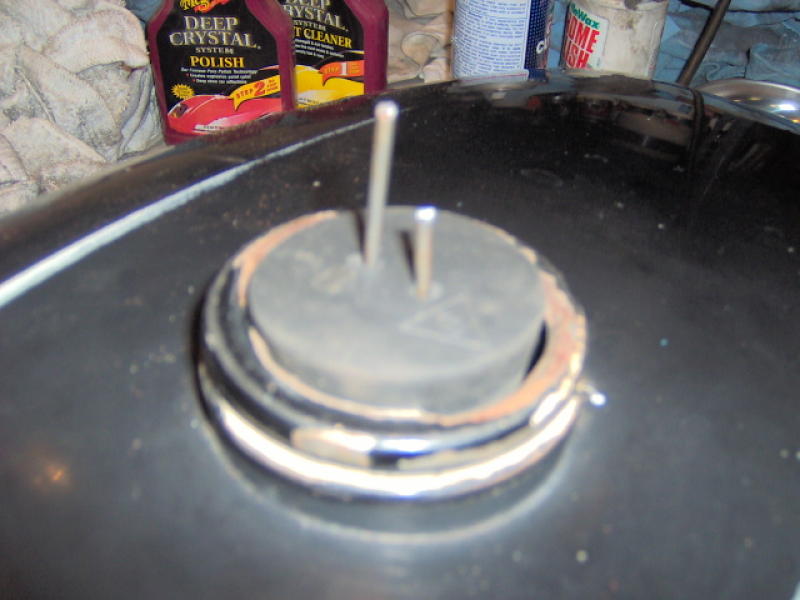
The rubber plugs were purchased at the local Ace Hardware, any good hardware store should have them. I've seen them in the hardware section of the local Lowe's. You want the black rubber not cork ones. The small ones are 3⁄8 inch at the smaller end, 9⁄16 inch at the larger end. The big one is 1.5 inch at the smaller end and 1.75 inch at the larger end. I used a 3⁄32 inch drill bit to make the holes in it for the sacrificial anode.
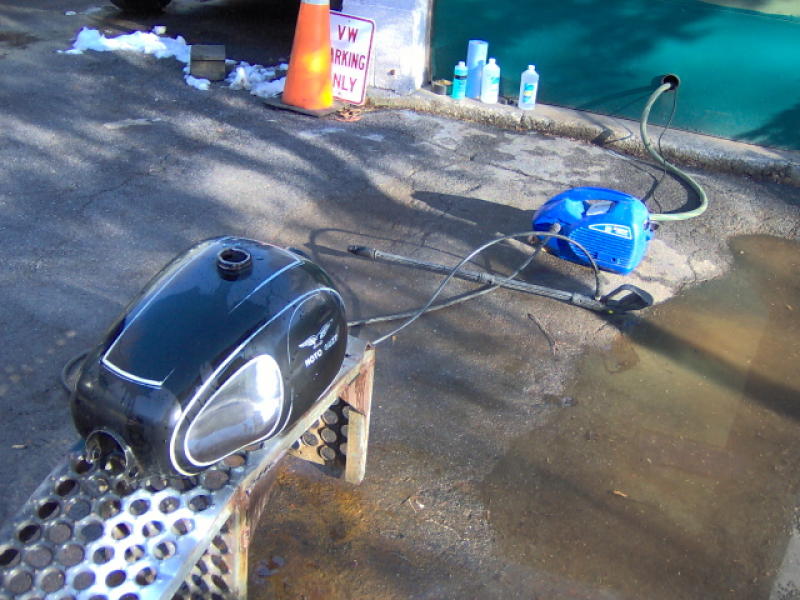
Following Charlie's lead, I now use this electrolysis technique prior to any coating. It works very well. Here are a couple notes from my personal experience.
If you cannot find the Arm & HammerSuper Washing Soda, just look in the pool section of your hardware store for Soda Ash (which is sodium carbonate). Soda ash is used to raise the pH level in swimming pools and is inexpensive.
I found coat hangers would disintegrate pretty quickly (I use a power supply). So, instead, I used bicycle hanging hooks (for hanging a bicycle from the rafters in a garage) that I purchased from the local hardware store inexpensively. It is really nothing more than a thick rod and they last a long time.
Keeping the tank in a horizontal position and filling it to the brim with the solution will still leave the underside of the top of the tank exposed. I found it necessary to carefully rotate the tank to ensure that all parts are submerged during electrolysis.
Evapo-Rust
Thanks to Charlie Mullendore of Antietam Classic Cycle for sending me this information via persona email. In Charlie's own words:
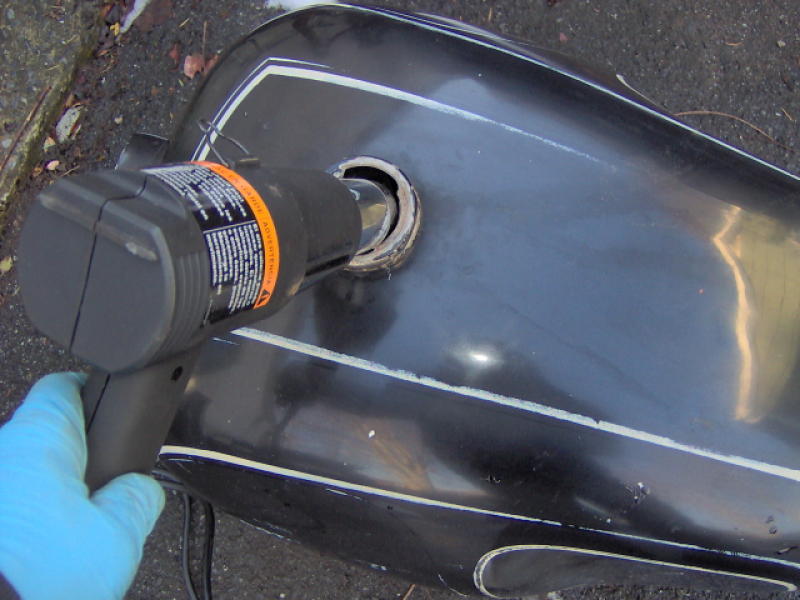
Just a quick note. Needed to remove some light rust from the inside of the latest customer's Eldo tank. Didn't want to go through the whole electrolysis process and couldn't find any milkstone remover locally. Did find a gallon of Evapo-Rust, so I thought I'd give it a try.
Since it was only a gallon, I had to rotate the tank to a different position every few hours. Did this for two days, then drained the Evapo-Rust, rinsed it out with water, then flushed with 92% isopropyl alcohol and dried it with the heat gun. The Evapo-Rust did an excellent job - the metal was clean and rust free. Another nice thing is it's reusable.
Horticultural molasses
Thanks to Ken Giese for providing the following information on the old Yahoo! Loopframe_Guzzi news group (which has now moved to Groups.io).
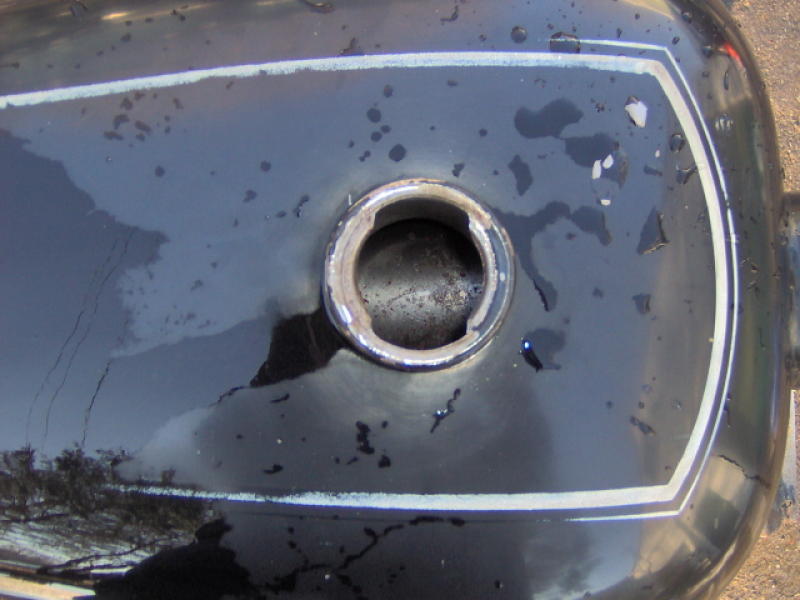
I picked up a gallon of horticultural molasses at a feed store. The 850 T has a collar inside the fill hole which REALLY limits access and sight angles. Top to bottom filling really appealed to me considering the top of the tank was probably where the bulk of the rust was. I forgot to mention that I rinsed the tank out first with soap and water to loosen things up. I also shook some bb's around. A real hassle getting them out as the filler hole collar leaves drainage to the petcock holes. Plugged up those holes and filled ‘er up.
Nothing happened for a few days (molasses is a long process) but about the 3rd day I noticed the solution was draining out the top onto the floor. Topped it back up and even more on the floor the next day. Then it started burping every once in awhile. Obviously some sort of chemical reaction. I decided to put the cap back on and shake it up in case of settling. Wow. When I opened the cap it exploded out like a shook up cola bottle. What a mess, so a word to the wise. All said I let it set for about 10 days, drained it and rinsed with water. Bare metal. I was impressed!
After it dried, I sloshed around some phosphoric acid to prevent rusting until I add gasoline. Figure I can treat the tank again in a few years if desired rather than add a sealer.
Update:
My yearlong, slow restoration project is nearly complete; meaning that blasted tank sat with nothing in it and rusted again! Not bad, but more than flash rust. The phosphoric acid treatment only lasts so long by itself. So, this time I sealed it with POR-15 after researching the product and corresponding with their service dept. I again got the rust out with molasses. I didn't buy their kit, just the sealer. Terrific product. Yes, if the bike was ready to ride I could have just filled it with gas and been done with it as originally intended. Interestingly, POR-15 thought I'd be ok naked with a full tank of gas. But with the next step of painting and a planned Oct launch I like knowing it's sealed.
Moyer Fuel Tank Renu
Thanks to Lannis Selz for providing the following information on the old Yahoo! Loopframe_Guzzi news group (which has now moved to Groups.io). In Lannis' own words:
After years of fighting fuel tanks, trying to clean old braze out of seams to get a clean weld, experimenting with sealers, trying to figure out how to get the old sealer out (because it never seems to hold), I found Moyers Fuel Tank Renu and will never go back.
Having a known-good fuel tank is important to me, I hate leaks, I hate fires, I hate little stringers of goo in my jets stopping me in the rain on a long trip. And since it's something you only have to do ONCE per fuel tank if it's done right, it's worth it.
Moyers takes your tank, plasma-cuts the bottom out of it, bakes it at 800° F to burn all the old goop and solder out, fixes all the seams and leaks with MIG or TIG welds as needed, straightens it out, welds it back up, grinds and handworks the seam so you can't see it, seals it with some sort of red sealer that never quits, gives the outside a coat of primer, and sends it back. My last tank was USD $290.00 for this treatment; I've never had one leak or fail after all this...
Milkstone remover is sold in gallons and is very reasonably priced - about USD $7.00. Use about 1⁄3 gallon, and then fill the tank with water to the very top. Let it sit for a day or so (in the sun helps a little), empty it, rinse it, and dry it with a heat gun and a little alcohol. The phosphate leaves a coating to inhibit rust. The solution also can be re-used. Just filter the crud out, and bottle it up.
You can get milkstone remover at Tractor Supply Company. Dairy farmers use it to clean their milking equipment.
I have mixed it 50:50 for the really rusty stuff. You just have to be more careful if you are trying to preserve original paint. More dilute mix just takes longer. After use it I filter it through a fine screen and re-use.
I can get a gallon of phosphoric acid for about USD $7.00 at the local farm store. Its labeled as pipeline cleaner or milkstone remover.
Works good as a rust remover but don't get it anywhere near aluminum. That includes the petcock. It will eat that away in a couple of days. For badly rusted tanks I will fill it with a mix of the acid and water and let it sit. Sometimes I will put some nuts and bolts or a length of chain it it to knock some of the stuff loose. Every time I walk by it I'll give it a shake.
POR-15
In Gregory Bender's own words:
The fuel tank on my Ambassador was showing signs of rust on the inside. So, prior to having it painted, I used a several stage system designed to (1) remove gum, sludge, and varnish, (2) remove rust and prepare the tank for the sealer, (3) seal the tank against any further damage. The kit worked great and I've had no problems. The kit even came with a patch for repairing holes or weak areas, but I did not use it and cannot attest to it's ability. I purchased the entire kit from a company called POR-15. They call it a cycle fuel tank repair kit.